Showing posts with label Designer Crafts Connection. Show all posts

Thursday, May 17, 2018

Jazz up a Jacket with Expo International Trim


I am so happy to be hopping... blog hopping that is! This month's Designer Crafts Connection blog hop is featuring Expo International trim. Expo International makes some of the most beautiful ribbon, trims, and appliques on the market. Follow me as I show you how I used some amazing appliques to take a plain black blazer from "blah" to "WOW", all with absolutely no sewing!

First, let's talk a little about my inspiration for this project. I love classic country music. I was raised on those old country songs and even went to college in Nashville, TN. One of the things that I love from the old days of country are the highly decorated "Nudie suits" that were worn back in the day by Porter Wagner and Dolly Parton (the suits were made by a famous tailor named Nudie Cohn). The suits featured lots of sequins and embroidery.


I wanted to make my own version of the Nudie suit, but a little more contemporary and a little more subtle, but still with lots of flair... and that's where Expo International comes in!

Materials used:

How to create:
  1. Cut beaded trim to fit length of all pocket openings. This trim is so cool because you can cut it with scissors! It has a really neat, rubbery back to it that holds all those beads together.
  2. Attach beaded trim to all pocket openings (breast pocket and 2 lower pockets) with fabric glue. I used Fabri-Tac from Beacon Adhesives.
  3. Iron on embroidered letters on front and back. I placed the front letter right on the breast pocket, directly under the beaded trim.
  4. Iron on rose applique and embroidered letter onto the back of the jacket.
And that's it! It was so easy and I didn't have to sew one single thing! Now I have an updated take on the classic country suit jacket with just enough flair that will make everyone take notice.

If you want to see more gorgeous projects using Expo International trims and appliques, click HERE for all of the other designers' blogs in the hop. We are also giving away a prize pack full of Expo goodies -- just comment on the DCC blog post and tell us what projects you loved!


Happy crafting!


Thursday, February 22, 2018

Mixing It Up with Marabu!

Today here on Forty11 Designs, I am mixing it up with Marabu and the Designer Crafts Connection! I'll show you how you can make totally cute painted spring vases using Marabu Porcelain and Glass Paint.


Marabu makes amazing color products for fabrics, mixed media, and more, but our blog hop is focusing on their porcelain and glass paints. These paints are highly pigmented, come in bottles and markers, and (the best part) are dishwasher-safe!

For this project, I picked up these colored vases at the dollar store (y'all know that is my favorite place for crafting materials). They had a lot of great colors, but I went with yellow, pink, and purple for a springtime feel.


I made sure to wash them thoroughly so that the paint would have a clean surface to adhere to. I then used an adhesive stencil on two of the vases (a chevron pattern on one and a flower pattern on the other), and applied the paint with a sponge paintbrush with a pouncing motion.


For the other vase, I went with a more free-hand approach. I made polka dots in white, blue, and green just using a round sponge pouncer. Now, I'm gonna admit something here... I totally forgot to take a photo of that process, but you can basically figure it out from the final photo!

How awesome and easy is that? Just think of all the plain glassware from the dollar store that you can turn into cool custom pieces!

There are so many other ways to use Marabu Porcelain and Glass Paints and Markers -- just follow these links to the other DCC blogs in this hop!


But that's not all! Marabu is giving away an assortment of their products (retail value $75)! 


Just click here and comment on the Marabu post on the Designer Crafts Connection Facebook page to enter. (This giveaway is open to U.S. residents only.) Good luck and stay crafty!

Wednesday, April 19, 2017

Mother's Day Card featuring Rinea Foil


Show your mom just how much you love her with a beautiful handmade card using Rinea double sided foil paper!

Thursday, March 16, 2017

Etched Glass Lantern featuring Etchall


Hello crafters -- Lorrie here and today, I am " blog hopping" with the Designer Crafts Connection and Etchall! We are bringing you some really cool etched glass crafts using Etchall, a glass etching cream that is like no other. I will show you how to turn plain glass into frosted "antiqued" glass using nothing but Etchall and a sponge!

Wednesday, July 20, 2016

Celebrating with Deflecto and DCC


"Celebrate good times, come on!"

OK, so I may not be Kool and the Gang, but celebrations are awesome! This blog hop with Deflecto Crafts and the Designer Crafts Connection is all about celebrating: weddings, birthdays, holidays, and any other occasion that make you want to party. And what better way to party than with dessert?!

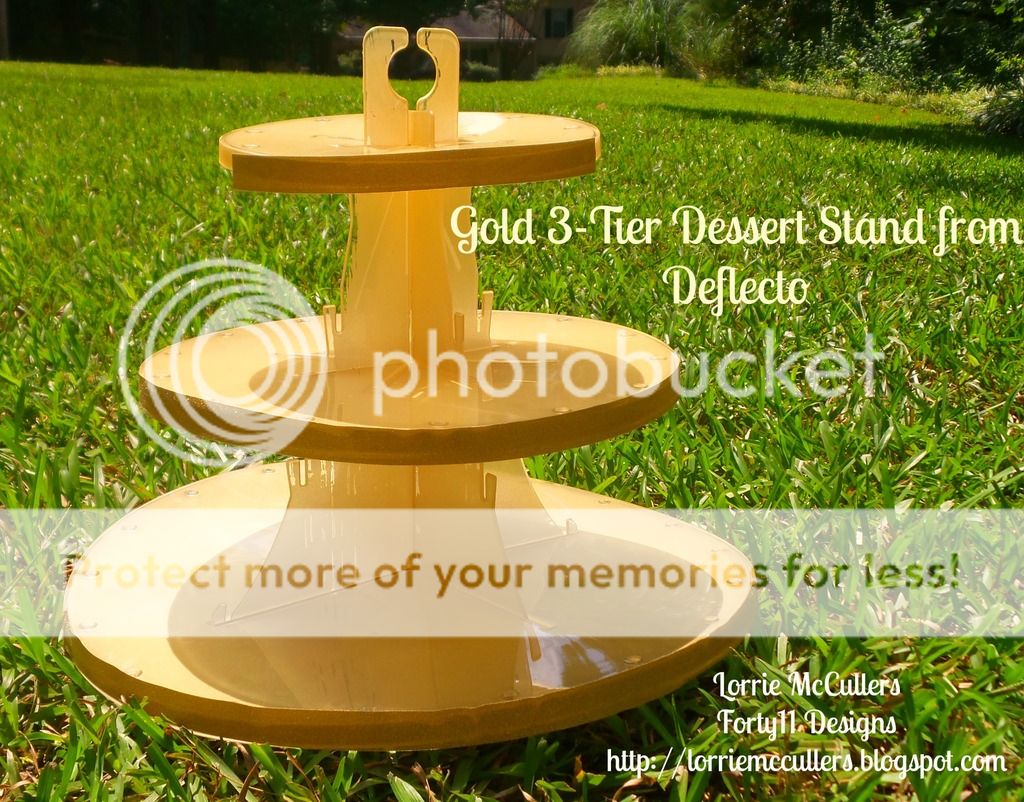
Today, I am featuring the 3-Tier Dessert Stand from Deflecto. This stand is amazing because you can aadjust the height of the plates (great for taller cupcakes) and it completely knocks down to store flat. Yes, it stores totally flat so you aren't scrambling to find storage space for it in your kitchen!

It's made from beautifully clear acrylic that matches any decor and is easy to clean. However, I wanted to jazz it up a little, but still have it be able to match anything. So I used an amazing product called "Tint It" from Design Master. It's a transparent dye in a spray can that you can use to change the color of almost anything. It works beautifully on Deflecto's acrylic products! For this project I used their "gold shimmer" Tint It to give it just the right amount of sparkle. It also will also match any celebration decor!


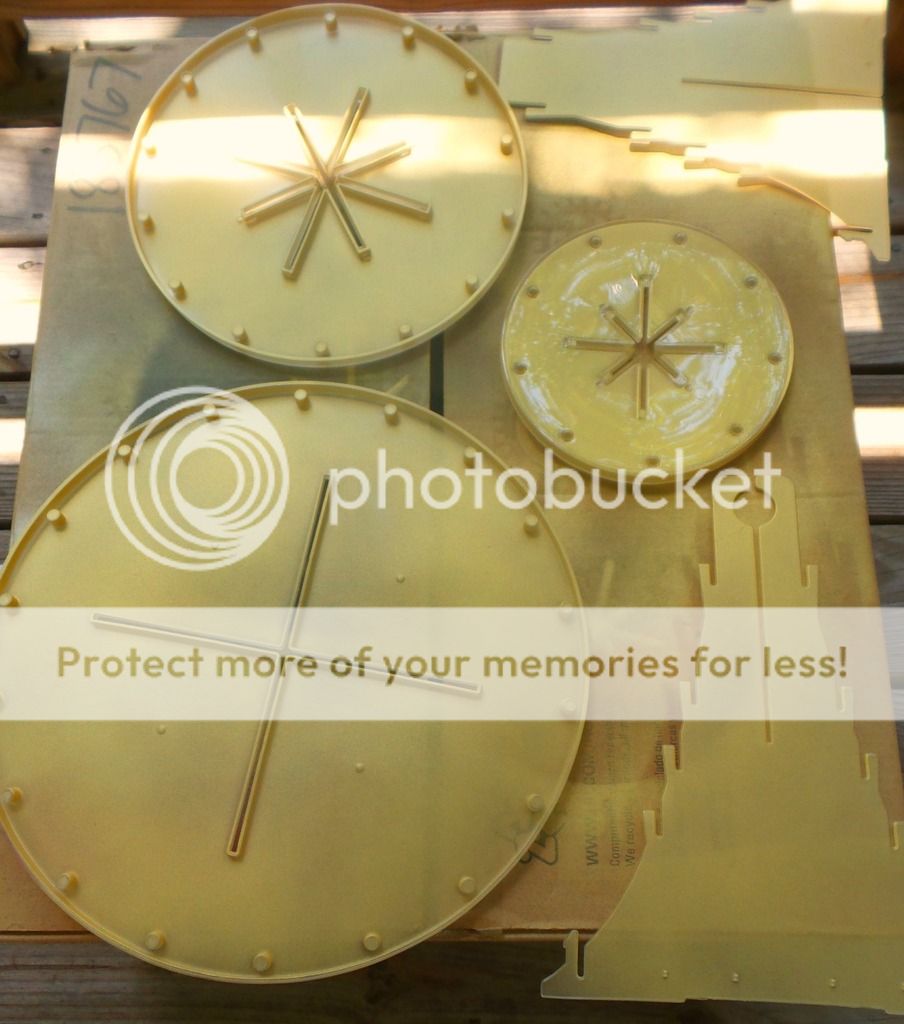
I sprayed the under-side of all three tiers of the dessert stand. I only sprayed the under-side so that the top would still be food safe and easy to clean. I also sprayed the two supports. The great thing about the Tint It spray is that you can adjust the color strictly by spraying it a little or a lot! I sprayed mine a lot to give it a more opaque finish.

I then finished it off the edges with some gold sparkle tape from Darice. The great thing about this stand is that tape is easy to remove so you can customize it to any celebration! Add ribbon for birthdays, gold sequins for New Year's Eve... the possibilities are endless!

To see what other designers in this blog hop have done with these amazing Deflecto products, go to the Designer Crafts Connection logo in my sidebar.

Are you social? We are too! Please check us out at the following locations:

Deflecto Craft - Facebook Page


Disclosure: This is a sponsored post. As a member of the Deflecto Design Team I have been provided product in exchange for my creative ideas, views and opinions.

Thursday, August 27, 2015

Crafting with Office Supplies Blog Hop


This month, I am participating in the Designer Crafts Connection Manufacturer Challenge sponsored by Deflecto. We are crafting with office supplies!


When I look around, I see all kinds of surfaces that need to be "jazzed up". Office supplies are no exception. Why have a boring nameplate like everyone else when you can bling it up and show off your personality?!

Tell everyone in your office that The Diva is In (or out) with a nameplate from Deflecto. The sparkly beauty above started life as a regular black nameplate, but with just a little work, became a diva-fied office statement!

To make your own, you need:


  1. Deflecto Interior Image Sign Holder Nameplate (available at Amazon and other retailers)
  2. glitter paper
  3. adhesive rhinestones
  4. ribbon
  5. Mod Podge (I used Glitter Mod Podge for extra shine)
  6. letter stickers
  7. cardstock or patterned paper
  8. glue dots
  9. scissors
  10. foam brush
How to:
  • Trace the top part of the nameplate onto the back of the glitter paper and cut out. Using your foam brush, coat the back of the paper with Mod Podge and place the paper onto the nameplate. Coat the paper with Mod Podge, making sure that the edges are adhered well. Let dry.
  • Once Mod Podge has dried, place assorted rhinestones on the glitter paper.
  • Using glue dots, attach ribbon to top and bottom of the area where the nameplate goes, leaving one end unattached (so you can slide your nameplate in).
  • Cut your cardstock or patterned paper to be 8.5" x 2". Then use letter stickers to spell out your name or message. I made an extra piece so that my sign could also read, "The Diva is Out".

Want your own Deflecto supplies to craft with? You can win them in the Deflecto/DCC giveaway!


We are giving away a Deflecto frame and a Stackable Cube Organizer, perfect for your craft stuff like pens, inks, buttons, beads, and more. Just go to the Designer Crafts Connection homepage and enter to winvia Rafflecopter.

If you want to see what other designers have done with their office supplies, use my DCC link button on the right side of this page to hop to all of the other fun projects!

Disclosure: This is a sponsored post. As a member of the Deflecto Design Team I have been provided product in exchange for my creative ideas, views and opinions.
 
Images by Freepik