Friday, December 9, 2016
"Cookies for Santa" DIY recipe frame and signs
We all know the importance of leaving cookies and milk for Santa. After all, he has to get hungry while traveling all around the world, right?
This year, I am keeping that tradition alive with this cookie display using Deflecto frames and sign holders. Both of these can be used over and over so that you can display them year after year.
Thursday, December 1, 2016
"Santa Stop Here" sign
Want to make sure Santa pays you a visit? Then make a sign telling him! This quick and easy craft is fun for kids and adults alike.
Materials needed:
- blank wooden sign
- red acrylic paint
- foam paintbrush
- Design Master SnoBlast spray
- JOY embroidered stick-on letters
- Paint sign with red acrylic paint using a foam brush. Allow paint to dry. I am super impatient, so I used a heat gun to speed up the process.
- Stick on the embroidered letters (I like to stagger my letters so that I don't have to worry about them being straight!)
- Spray sign with SnoBlast spray. The amount of snow is all based on personal preference; I wanted my letters to really stand out so I just gave my sign a light dusting of "snow", but you can always add more! Also make sure you use this spray outside or you will end up with a covering of "snow" all over your house -- believe me!
- Hang and enjoy!
There's no way that Santa will skip your house with this sign, even if you have been naughty!
Happy holidays and happy crafting!
Sunday, November 6, 2016
DIY Spa Party!
Are you looking for a fun party idea for your tween girl? How about a pampering party?! You can provide "salon services" for her and her friends and Deflecto can help!
I used Deflecto's new Event Kit to put together this fun and frugal party set-up. This kit is fantastic for any kind of party because it contains everything you need for displaying signs, banners, and more!
This kit contains the 3-Tier Dessert Stand, angled sign holders, 3"x4" mini slanted sign holders, sign and banner hangers, Versa-Grip double clip sign holders, Versa-Grip wide clip sign holders, and flexible sign danglers.
For my little spa soiree, I used the 3-Tier Dessert Stand not for food, but for displaying nail polish! It makes for cute decor and it allows the guests to easily choose their color. All I did to make it match my celebration was add some pink and black ribbon to the edge of each plate. The best part is after the party, you can take the stand apart -- it stores completely flat! On top, I used the Versa-Grip wide clip sign holder to hold the large "Pamper Party" sign. This wide clip fits on the Dessert Stand perfectly!
For the signs advertising the "spa services" the guests can pick from, I used the angled sign holders. Using a hot glue gun, I added a little pink gem to each one to match the decor.
The best thing about this type of party is that it is very budget-friendly. All of the beauty supplies can be picked up at the dollar store! For less than $30, you can pamper several girls with bath poufs, nail files, nail polish, lotion, and more, and then all of those things can be taken home as party favors!
If you’re interested in purchasing the items used in this project and more, then tune in on November 14th to Create and Craft for their first ever feature of Deflecto’s new Event Kit. The perfect kit for your next party, get yours before they’re gone! Click HERE to find out where to watch!
Tuesday, November 1, 2016
Easy Thanksgiving Centerpiece
Every Thanksgiving table needs a pretty centerpiece, so let's make one using Deflecto Craft products and JOY embroidered letters!
I started with a mini straw bale and a fall floral pick that I found at Hobby Lobby. I then split the pick apart into individual pieces so that I could arrange them the way I wanted.
I placed a Deflecto Flexible Sign Dangler under the metal pieces that hold the straw bale together. These sign danglers are amazing -- they are made of thin flexible metal so that you can bend them any way you want! They also have adhesive tabs on them, making it easy to attach a sign to.
I then made a sign using Deflecto Sign Tags and JOY embroidered letters. I cut the sign tag in half and applied the letters and leaves using glue dots (this style of letter is actually an iron-on, but I have had great success on non-fabric surfaces using glue dots or hot glue). Finally I attached the sign to the sign dangler. I covered the sign dangler with a leaf from the floral pick.
What a beautiful addition to my holiday table! And since these are so easy to make and budget-friendly, I may just make a few extras so my guests can take one home for themselves!
Sunday, October 23, 2016
"Time Warp" Halloween Wall Hanging
I am getting ready for Halloween with a little dance number!
Can you guess what my favorite Halloween movie is?
If you recognize my project as the lyrics to "The Time Warp", then you know I love "The Rocky Horror Picture Show"!
I decided to take the Deflecto Sign Tags and make a wall hanging featuring everyone's favorite Halloween dance.
The sign tags (which are awesome and they come with their own wet erase marker) start out looking like this:
But with a little bit of purple and green glitter tape and some Halloween embellishments from Michaels, they turn into this!
I punched holes in the sign tags using a Crop A Dile punch and then strung the signs together with some black glitter ribbon. Now this project can by hung on a wall or even on your door... stand back and let the dancing begin!
This project is a really easy one and is great for kids. You can always use lyrics from Halloween songs like "Monster Mash" or quotes from other Halloween movies too!
Thanks for checking out my project and happy hauntings!
Friday, October 14, 2016
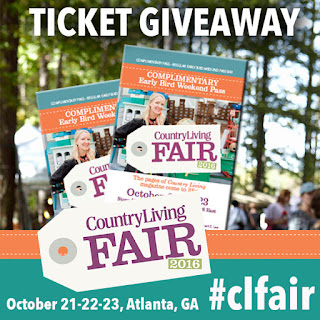
Win free Country Living Fair passes!
It's my favorite time of year -- Country Living Fair time! Every year, the Country Living Fair comes to Stone Mountain Park here in Georgia and it is absolutely AMAZING! I always find the best "stuff" there, from clothing to jewelry to home decor. The Fair will take place in the Event Meadow at Stone Mountain Park for the seventh year in row, and is expected to draw more than 20,000 visitors from across the country... and you could be there because I am giving away a pair of tickets!
The Country Living Fair brings the magazine’s content to life and gives readers access to a unique shopping experience featuring more than 200 vendors from 25 states, including antiques sellers, food purveyors, artists, furniture makers, crafters, and more. Guests will also have access to cooking, crafting, and DIY demonstrations, will be able to sample locally sourced, artisanal food, and can shop the Country Living General Store.
At the Country Living Fair, you will even have the chance to see some of your favorite home/DIY stars including:
- Amie and Jolie Sikes, The Junk Gypsies
- Cari Cucksey, star of HGTV’s Cash & Cari
- Denise Sabia, blogger, The Painted Home
- Jana Platina Phipps, The Trim Queen
- Joanne Palmisano, award-winning interior designer & regular DIY Network contributor
- Melissa Caughey of Tilly’s Nest, HGTV.com & CountryLiving.com writer and contributor
- Nancy Fuller, TV personality & author of Farmhouse Rules
The Fair will include some local GA vendors including EK Studio (Dallas, GA: beautiful photography, pottery and jewelry), French Silver Shop (Marietta, GA: Homemade tea towels, baby onesies, and more), Re:loom–weaving a better life (Decatur, GA: Knit home, style, and pet accessories; charity that provides permanent, affordable housing to homeless and low-income families in metro Atlanta), Spoon Sisters (Tyrone, GA: local antiques and treasures), Textile & Twine (Atlanta, GA: vintage-inspired aprons and home linens), The Perky Moose (Atlanta, GA: unique gourmet beverages-coffees, cappuccinos, and more).
WHEN: October 21, 22, 23
10 a.m. – 5 p.m.
Gates open for Early Bird ticket holders at 8:30 a.m. Friday & Saturday.
Gates open for ticket holders at 10 a.m. Friday, Saturday & Sunday.
WHERE: Event Meadow on the grounds of Stone Mountain Park, a scenic recreation area 16 miles east of downtown Atlanta [Exit 8 off of U.S. Highway 78]
TICKETS:
- One day admission is $13 in advance and $16 at the door; three-day weekend passes are available for $15 in advance and $20 at the door;
- An Early Bird three-day weekend pass is available for $40 and grants early admission at 8:30 a.m. on Friday and Saturday;
- Free admission for children ages 16 and under.
The 2016 Country Living Fair in Atlanta is sponsored by Go RVing, Great American Country – Flea Market Flip, Jelly Belly©, and Wagner, and is produced by Stella Show Management Company. For tickets and additional information, including a list of vendors and discounted hotel rates, contact Stella Show Management Co. at 1-866-500-FAIR or stellashows.com. For additional details, visit countryliving.com/fair.
Don't you want to go?! Well, I am giving away two free passes! All you have to do is comment below and tell me your favorite home/DIY star. But do it soon because the giveaway closes on October 18 at 2:00 EDT! Good luck and happy shopping!
Friday, August 26, 2016
Personalized Blinged Out Cell Phone Case
It's back to school time! Have the kids been bugging you for a new cell phone for the new school year? Did you laugh at them? (Hey, I don't have kids -- I'm not judging!) Well, at least you can make that old phone look new with a fancy blinged-out and personalized cell phone case!
If y'all know anything about me, it is that I am cheap. Like super cheap. Like "Do I need to throw this ziploc bag out or can I reuse it?" cheap. So I do a lot of my shopping at the Dollar Tree. Everything in there is just a dollar. Y'all, ONE DOLLAR! The last time I hit up the Dollar Tree, I grabbed one of these cell phone cases for a Samsung Galaxy5. They had some for several different phones, but none of this new Galaxy7 mess, so if you have a new phone, you may be out of luck. Anyway, I took that bad boy home and got to crafting.
I decided this little case needed some bling. Isn't there some song called "Hotline Bling"? I am old and out of touch so forgive me, youngsters who might be reading this.
Any-hoo, for the bling, I used self-adhesive rhinestone sheets from The Buckle Boutique. These sheets are awesome. You can cut them with scissors, cut them in a die cut machine, use a paper cutter or craft knife -- seriously, they are life-changing.
I put a JOY stick-on embroidered "varsity block" letter on top of the rhinestone sheet and cut around it to give the letter a bling-y outline. These letters from JOY are so cool because they give the look of fancy machine embroidery, but you can attach them to anything. I pulled the adhesive backing off the rhinestone sheet and placed it on the case. Then I cut single lines of rhinestones from the sheet and placed them on the chevron designs of the case. That's it! So easy and it looks amazing!
If you want to see more cool stuff using JOY, stop by the "Creating with Joy" blog where the design team shows you what you can do with these handy little letters. You can also find JOY letters at Michaels and Hobby Lobby so you can make your own personalized crafts.
Thanks for stopping by. Keep on crafting!
Disclosure: I am a design team member for JOY embroidered letters. I was provided with free product in exchange for my original ideas and designs.
Wednesday, July 20, 2016
Celebrating with Deflecto and DCC
"Celebrate good times, come on!"
OK, so I may not be Kool and the Gang, but celebrations are awesome! This blog hop with Deflecto Crafts and the Designer Crafts Connection is all about celebrating: weddings, birthdays, holidays, and any other occasion that make you want to party. And what better way to party than with dessert?!
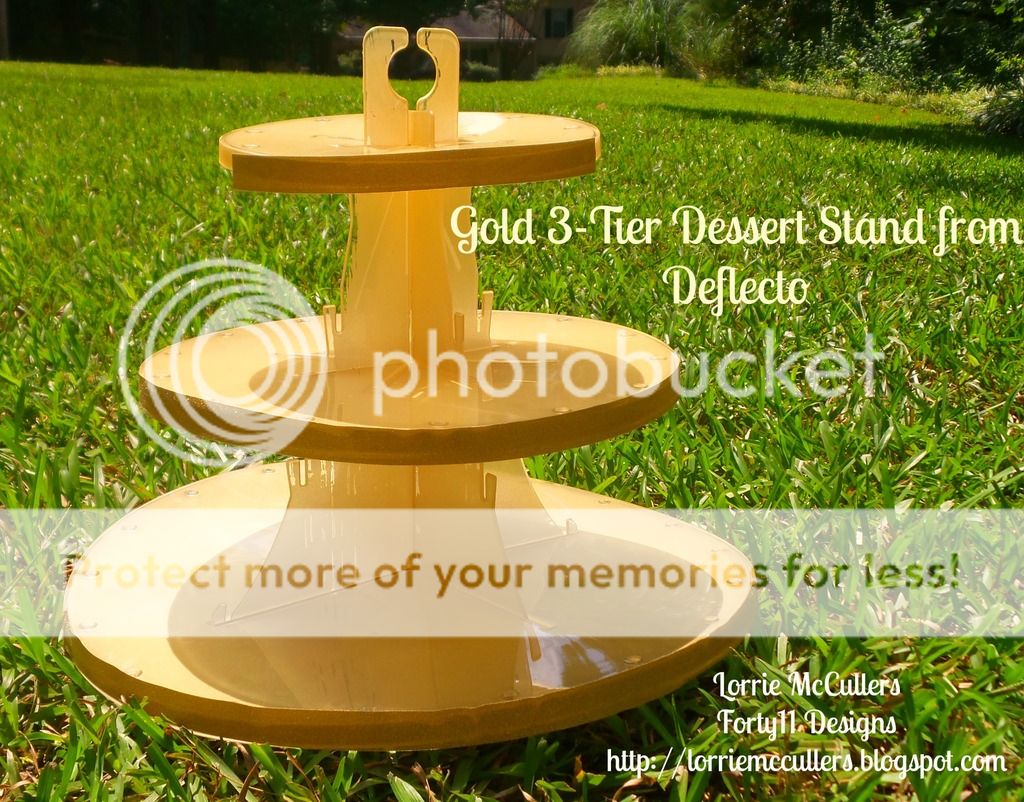
Today, I am featuring the 3-Tier Dessert Stand from Deflecto. This stand is amazing because you can aadjust the height of the plates (great for taller cupcakes) and it completely knocks down to store flat. Yes, it stores totally flat so you aren't scrambling to find storage space for it in your kitchen!
It's made from beautifully clear acrylic that matches any decor and is easy to clean. However, I wanted to jazz it up a little, but still have it be able to match anything. So I used an amazing product called "Tint It" from Design Master. It's a transparent dye in a spray can that you can use to change the color of almost anything. It works beautifully on Deflecto's acrylic products! For this project I used their "gold shimmer" Tint It to give it just the right amount of sparkle. It also will also match any celebration decor!
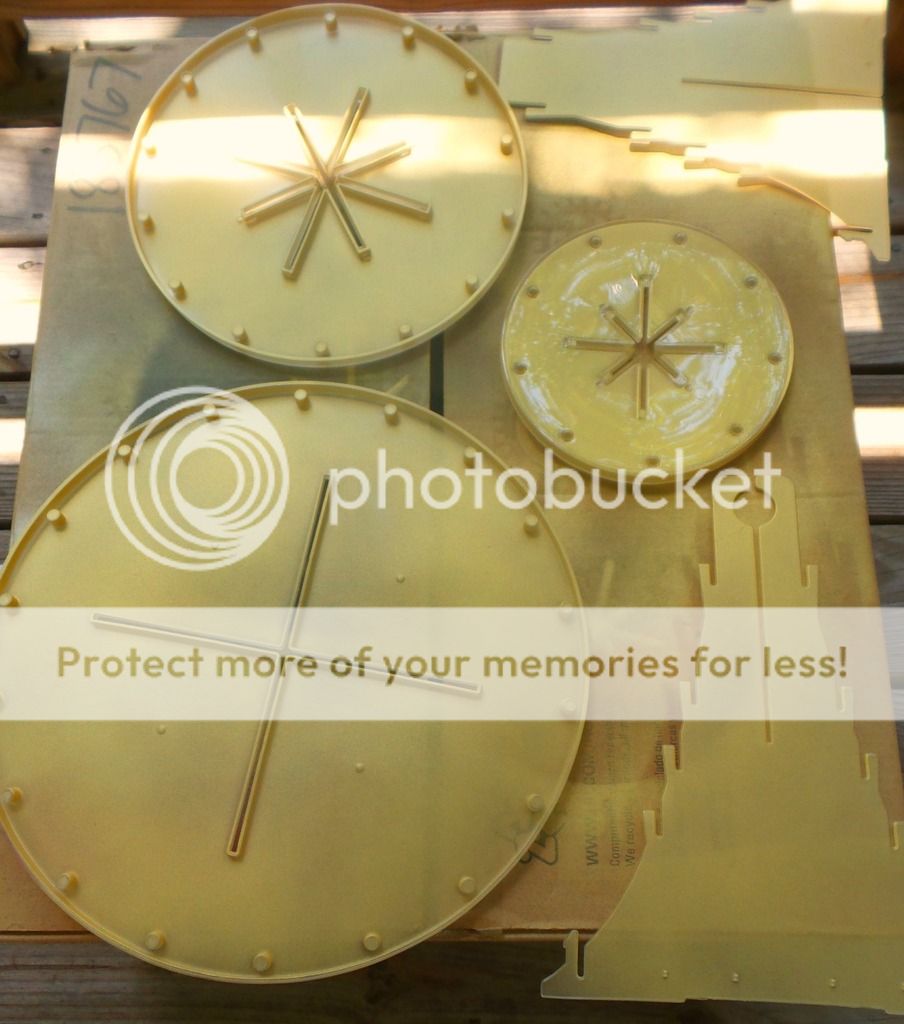
I sprayed the under-side of all three tiers of the dessert stand. I only sprayed the under-side so that the top would still be food safe and easy to clean. I also sprayed the two supports. The great thing about the Tint It spray is that you can adjust the color strictly by spraying it a little or a lot! I sprayed mine a lot to give it a more opaque finish.
I then finished it off the edges with some gold sparkle tape from Darice. The great thing about this stand is that tape is easy to remove so you can customize it to any celebration! Add ribbon for birthdays, gold sequins for New Year's Eve... the possibilities are endless!
To see what other designers in this blog hop have done with these amazing Deflecto products, go to the Designer Crafts Connection logo in my sidebar.
Are you social? We are too! Please check us out at the following locations:
Deflecto Craft - Facebook Page

Disclosure: This is a sponsored post. As a member of the Deflecto Design Team I have been provided product in exchange for my creative ideas, views and opinions.
Tuesday, July 12, 2016
Beach Vacation Mini-Album
Who says you have to do a full 12x12 album for your beach vacation? A mini-album shares your favorite photos and is a fast way to get those pictures off your phone and ready to share. And the fastest way that I know to make a mini-album is by using Deflecto 3"x5" flexible pouches, Deflecto pear clips, and mini-collections from Keller's Creations!
This 10 page beach-themed mini-album was made in about 30 minutes and it uses the "Alisha's Beach House" mini-collection. That's 2 full sheets of 12x12 paper, 1 sheet of 6x12 paper, an alphabet sheet, and 4 embellishment sheets... and I had lots left over! These mini-collections are fantastic because the 12x12 double-sided printed paper is divided into 6x6 quadrants. This gives you a ton of options on how to cut and combine the papers. All I added was white scrap paper, a couple of brads, blue ink, and some ribbon -- all stuff I had in my scrap room anyway.
The album is the perfect size for Instagram photos or photos using those adorable little Instax cameras. Plus, you can easily throw it in a purse so you can share it with all of your jealous co-workers when you return from your beach getaway!
You can find these pouches and lots more Deflecto products at Amazon.com!
Father's Day Frame
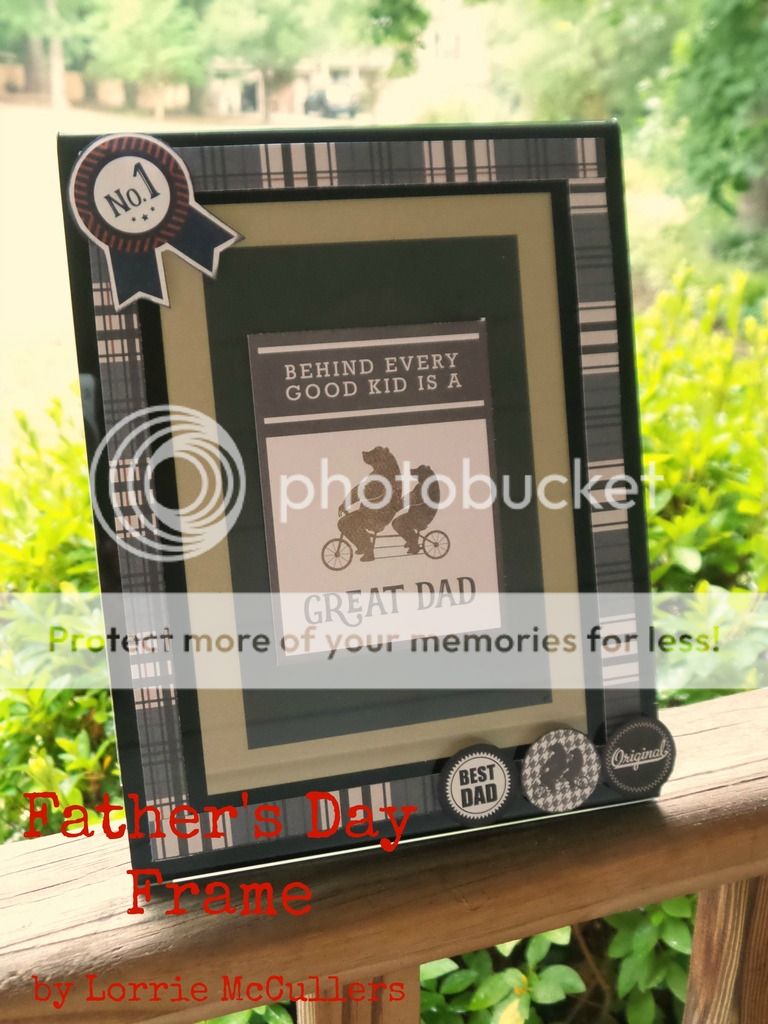
Dad doesn't need another tie -- give him a DIY gift instead!
Show Dad how much he is loved with this fun frame from Deflecto! This masculine-themed frame will be an awesome addition to Dad's desk.
I used the Superior Image black border frame as the base for my project. I then decorated the frame using patterned paper and embellishments from Photo Play Paper's "This Guy" collection.
For sterp-by-step directions, head on over to the Deflecto Crafts blog
Sunday, June 5, 2016
Shabby Chic Pencil Storage
I am a sucker for office and storage supplies. I get positively giddy when I go into an office supply store. But sometimes, the supplies are just a little plain for my tastes. So I like to take those supplies and turn them into something that can take pride of place on a desk. Today's project is just that -- I took a pencil holder and turned it into a pretty shabby chic piece!
I started with Deflecto's pink pencil cup with photo frames. Now just this holder by itself is adorable because, hey, it's pink!
But I wanted to fancy it up a bit so I decorated the outside of the cup using beautiful organza rose ribbon from Maya Road.
I then went to work on the inside of the pencil holder, attaching some vintage-print ribbon, a vintage button, and an iron-on letter from JOY embroidered letters (I just used a hot glue gun to attach the letter rather than iron it on). I wanted a vintage feel for the photos in the frames too so I used paper from 7Gypsies and Salvage Stickers: Lost and Found from Tim Holtz. As Tim calls them "found relatives"!
Sunday, May 15, 2016
Graduation Photo Frame
It's graduation time again! This is one of the most exciting times in a person's life, and is always a great opportunity for some unforgettable photos. Make sure that you display those memories -- it's easy with a Deflecto acrylic frame and a few simple embellishments!
I started with Deflecto Crafts 4x6 purple border craft frame. I love the transparent quality of acrylic frames so I wanted to play off of that and use translucent embellishments that wouldn't overwhelm the frame. I chose some silver rub-ons to go around the frame opening. Rub-ons are fantastic to use on these frames; they are easy to apply to the acrylic and they adhere beautifully. Plus they are crazy easy to use - just rub and go!
Next I chose a large fancy "frame" rub-on to apply to the bottom left corner. In keeping with the translucent feel, I used a piece of vellum printed with the word "dream". I fussy-cut the word and adhered it straight onto the rub-on using vellum adhesive (this is a staple in my craft room because vellum adhesive won't show through). I finished by adding a beautiful glittered flower from Prima.
This frame would be a great display piece for a graduation party - so inexpensive and so easy!
Friday, March 18, 2016
Hoppin' with Deflecto and Stampendous!
The super talented team from Stampendous will be showing off their projects this week too so be sure to check out their blog too!
Are you social? We are too! Please check us out at the following locations
Deflecto Craft - Facebook Page
Stampendous - Facebook Group
Stampendous - Facebook Page
For this week's hop project, I used the black 5X7 craft frame from Deflecto and the "Family Home" and "Home Forever" stamps from Stampendous.
I stamped the sentiment from the "Home Forever" stamp onto yellow cardstock using black ink. I then attached the cardstock to patterned paper featuring cute little houses that matched the stamps perfectly. I finished the piece by edging the yellow carstock with washi tape and inserting it into the frame.
Next I stamped the houses using the "Family Home" stamps on white cardstock. Seriously -- how adorable are these? I love that the little houses have words and phrases on them like "love nest" and "home for hugs". And the set is great because it comes with home-related sentiments as well as the house images. I colored them using Copic and Spectrum Noir markers.
I then edged the frame's opening with blue ribbon to add a little texture. I cut out the stamped house images and attached them to the frame using adhesive foam dots for added depth.
This was such a fun project and would be a great gift for a house-warming party!
We have three prizes, and each will have a 3 Tiered Cake Stand from Deflecto AND a $20 Reward Card from Stampendous.
Now click on the links below and get to hoppin'! Remember to comment on each blog and then return to the Deflecto Blog and leave a comment there for your chance to win.
Forty 11 Designs (you are here!)
Sunday, February 14, 2016
"Reasons I Love You" Pocket Frame
I have lots of reasons that I love my husband, but I don't always verbally tell him those reasons. So I came up with this heart pocket project to let him know just why I love and appreciate him!
My reasons look something like this:
 |
| See why he's a keeper? |
And this doesn't just have to be for Valentine's Day -- you can always use it year-round to show your love for your spouse, kids, and friends!
Materials needed:
- Deflecto 8 1/2"x11" pink bordered frame
- pink and white cardstock
- plastic hearts (I found mine at the Dollar Tree)
- paper heart doily
- glue dots or hot glue gun
- paper trimmer or scissors
- pen
Instructions:
- Place pink cardstock in frame.
- Use glue dots (or hot glue) to adhere plastic hearts to frame border.
- Adhere doily to the center of the frame using glue dots (or hot glue). Only attach the bottom and sides of the doily, leaving the top open to make a pocket.
- Cut strips of white cardstock (1"x4"). Write one "love reason" on each strip. Place strips in the pocket made by the doily.
This project is amazingly easy, but it would mean the world to the recipient. So share your love today!
Disclosure: This is a sponsored post. As a member of the Deflecto Design Team, I have been provided product in exchange for my creative ideas, views and opinions.
Disclosure: This is a sponsored post. As a member of the Deflecto Design Team, I have been provided product in exchange for my creative ideas, views and opinions.
Thursday, February 4, 2016
CHA Mega Show 2016 Recap #3 - New and Noteworthy
Welcome back to my recap of the 2016 CHA Mega Show! Ihere's a look at new and noteworthy crafting products that I fell in love with.
First up is ARC Crafts! They have specialty paper, envelopes, labels (that you can run through a computer printer), adhesive backed sheets and more... all made of wood!
Next is 28 Lilac Lane, a new button collection from Buttons Galore, designed by May Flaum!
| Don't you just love the bottle that these buttons come in? |
How about your own stamp maker? Here's the new Mint custom stamp maker from Silhouette! This cool new machine lets you turn any font or any design (in the Silhouette Mint store) into your own stamp. Learn more about it here!
| Do you know how hard it is to find my name spelled correctly on anything? |
Now my vote for "Cutest Product at CHA... or Maybe EVER" goes to Little B's new"Wooderful Life"! With these adorable pieces, you can make your own music boxes, displays, and more. These pieces are not available yet; let's keep our fingers crossed that they will be soon!
Beacon Adhesives, one of my favorite adhesive companies, has a new concrete product out that really got my creative juices flowing -- Maker's Mix! It is a quick-setting concrete mix that you can use to make all sorts of cool projects like vases, bowls, beads, and more. The line even includes pigment powders that you can add to the mix to make custom colors.
Now while Creative Options is not new (they are my absolute go-to travel products when I go to a scrapbook crop), they have some beautiful new patterns on their cloth storage products and new colors of plastic storage (designed to match the cloth patterns)! Forget craft storage -- I just want to carry some of these bags as my everyday purse.
| Isn't this gorgeous? LOVE the colors! |
My last "new and noteworthy" find was Photo Play Paper. This new company has some of the cutest new collections of paper, stickers, and diecuts on the market. My favorite is "This Guy"; it really stands out as a fun, masculine option for pages and cards! And full disclosure time: I was honored to be asked to make some cards and pages for this booth!
| The card on the far left and the one in the front middle are mine, made with the "This Guy" collection. |
| "Party Boy" and "Party Girl" are two new collections. And my card is the yellow one on the second row! |
| More "Party Boy" goodies. Hey - who are those cute people in the pages on the left and right? |
Subscribe to:
Posts (Atom)
