For me, Thanksgiving is all about sharing our bounties with friends and family. And the best way I know how to share is through food. So for my November Deflecto design team project, I wanted to share my favorite holiday recipes in a special book.
At Craftiprint, I show you all the fun things you can make with a 3D printer. So what is 3D printing? Well, I wrote a little post about it here so you can learn about what it is and what it can do.
The awesome thing is that 3D printers are becoming more affordable every day. Soon we hope that everyone will have one in their home! That's why I am sharing all of these great craft ideas; you can see the cool things that can be made on a 3D printer and then get one for yourself!
So please come check out Craftiprint and get ready to get printing!
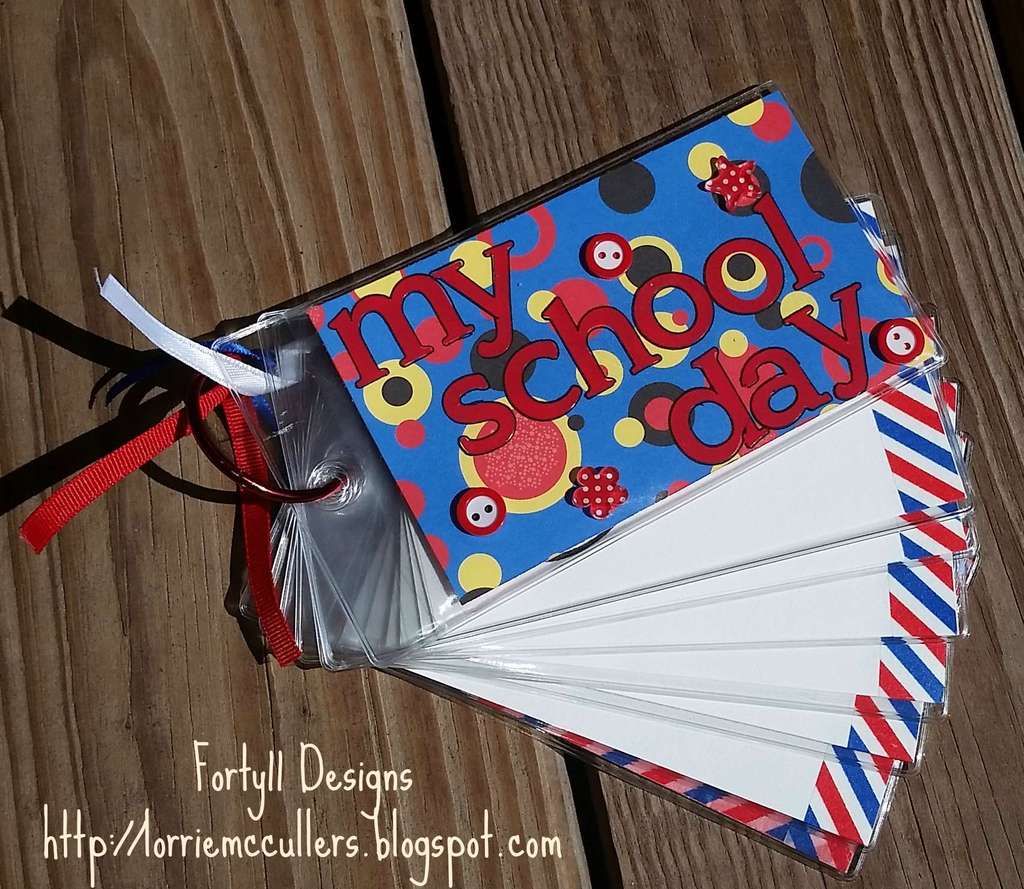
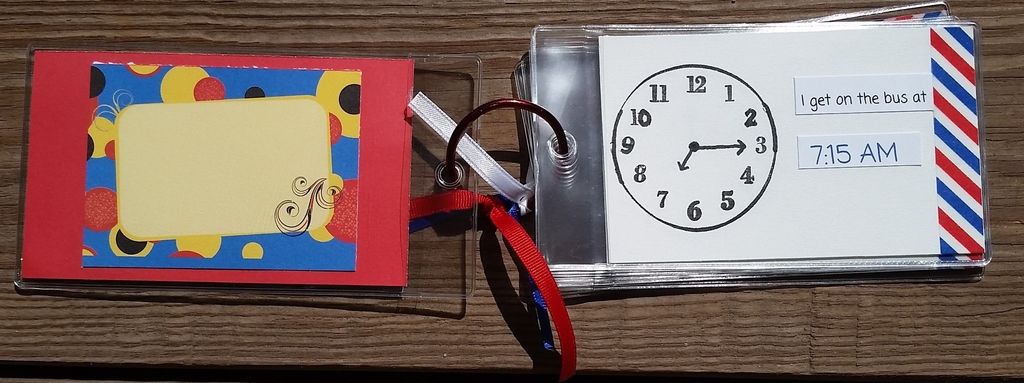
It may be only July, but here in Georgia it is almost back to school time -- kids go back in just a couple of weeks! And while a new school year is always an exciting time, it can also be a little stressful, especially for kids who are just starting school or kids who need a routine. That's where the "My School Day" book comes in.
When I was a teacher, I got a lot of questions about what time we would do certain things. First graders always wanted to know, "When do we go to recess? When do we go to art/music/etc?" With this little book, made from Deflecto's 3"x5" flexible pouches, you can introduce kids to their daily school schedule before the school year starts AND practice telling time!
Directions:
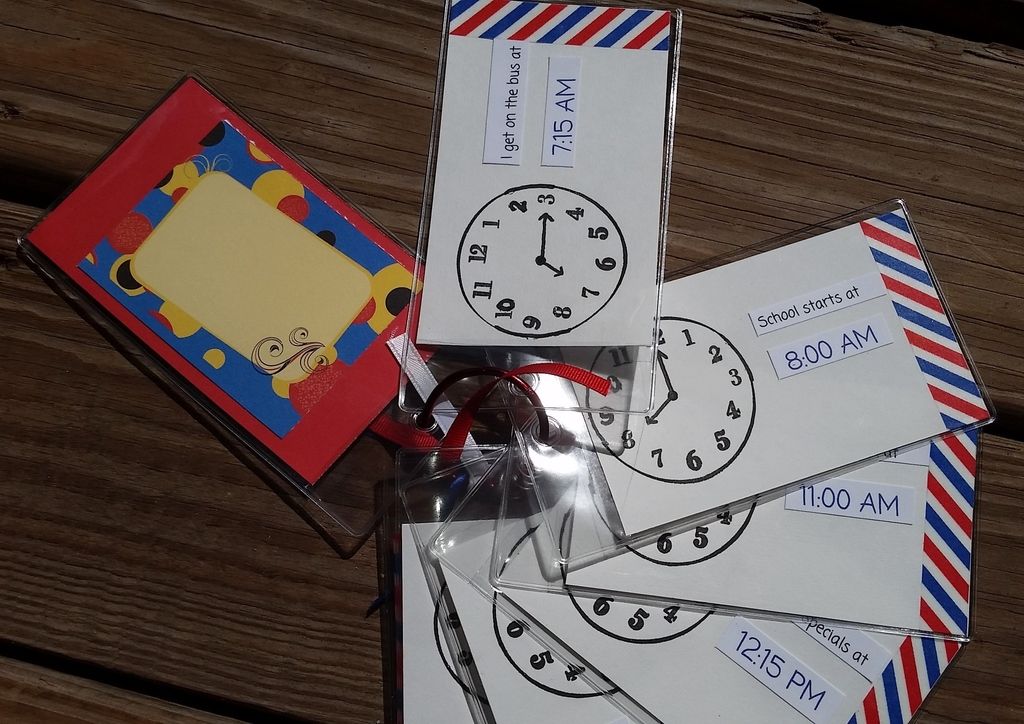
1. Stamp a clock face onto 3x5 pieces of white cardstock and put the appropriate time for the child's activities (you can get the daily schedule from the teacher before school starts). I made cards for getting on the bus, school start time. lunch time, "specials" time (art/music/PE), recess, and end of day, but you may need different ones for your kids.
2. Print the words and the times for each activity on the computer and attach them to each card. Of course, you can always hand-write these! With this, kids learning to tell time can match the clock face with the "digital" time.
3. Edge each card with washi tape.
4. Make a front and back cover. This is a great place to use scraps! Be sure to include a place on the inside of the front cover for the child's name, address, and phone number. If the child rides the bus, put what bus number they ride home on the inside of the back cover.
5. Use a book binding ring to hold the pouches together and decorate with ribbon!
With this book, kids get an introduction to their school day before the big day arrives. Since it's made with these cool pouches, it's small enough that kids can carry it in their book bags.
Here's to a less-stressful first day of school!
Materials used: Deflecto flexible pouches
white cardstock
patterned paper and journaling card from Keller's Creations
letter stickers from The Paper Studio
embellishments from Queen and Co.
adhesives from ThermOWeb
book ring
ribbon
clock face stamp
pen from Zig
Disclosure: This is a sponsored post. As a member of the Deflecto Design Team I have been provided product in exchange for my creative ideas, views and opinions.
Today, I am participating in a manufacturer's challenge showcasing products from Fairfield (the makers of PolyFil, American Spirit batting, and lots of other sewing/fabric products). I used their versatile Oly*Fun fabric to make a no-sew "proggy" pillow!
First of all, you may be asking, "What is Oly*Fun?" Well, Oly*Fun is an awesome, water-repellant fabric that can be used to make just about anything. You can use it like you would use paper or fabric so it's very versatile. It comes in a wide array of colors, and it is perfect for outdoor projects because it's weather-resistant.
Next you may say, "Then what is 'proggy' rugging?" Proggy (or proddy, depending on what area of Great Britain you are from) is a style of rug-making that uses small strips of fabric, a pointy-tipped tool called a proddy, and burlap (or "hessian" as the Brits call it!). Now, while this technique is mostly used for rugs, you can use it to make wreaths, stuffed toys, and more.
Check out this short video that explains how to make a proddy/proggy rug. This lady does a great job explaining how it's done, plus her accent is fantastic!
My favorite part about this pillow is that it is completely NO-SEW! Yep, not one single thing is sewn on this pillow, making it perfect for non-sewers (like me!) and older children!
1. Cut Oly*Fun fabric into strips of approximately 1/2"wide and 2-3" long.
You need enough fabric for about three times the area of
your finished piece.
2. Get a piece of loose weave burlap. It needs a more loose
weave so that the proggy tool will go through the holes more
easily. Size of the burlap depends on how large you want
your pillow.
3. Fold one edge of the burlap over about 2 inches. Always
work from the back of the project (the front will be the fluffy
side).
4. Starting in the middle of the row, poke a hole through the
burlap with the proggy tool. Use the proggy to poke the fabric
through the hole. Then move over three strands of burlap
and poke another hole, weaving your fabric into this hole.
5. Move over three more strands of burlap and repeat the
process until you get to approx. 2 inches from the ends. Fold
over the ends and repeat steps 4 and 5. You will fold over all 4
sides of your burlap until all sides are finished and you have a
square.
6. Once your borders are done, continue filling in the middle.
You can work in rows or just random -- its up to you!
7. After the burlap is filled in, take a piece of Oly*fun and cut it
approx. 2 inches larger on all sides than your burlap square
(so if your burlap square is 12x12, then your fabric should be
16x16).
8. Cut fringe into the Oly*fun edge with each fringe strip measuring
2 inches by 1/2".
9. To attach the backing, use your proggy tool to poke
the fabric through already established holes once(the backing
and fabric will share holes). Repeat until 3 edges are complete.
Leave the 4th edge open so you can stuff the pillow.
10. Stuff the pillow with polyester filling.
11. Finish last edge with the larger Oly*Fun backing
To get you started on your own pillow for less, use coupon code AMYCOUP to save 20% on orders at Fairfield World through the month of June!
For more "pillow talk" from other designers, just click on the Designer Crafts Connection logo in the right sidebar!
I have always loved summer. The laid-back times, the hot weather, my birthday -- I love everything about it. But the best thing about summer has to be vacation. It seems like almost everyone takes a summer vacation and it's something to look forward to during those long winter months.
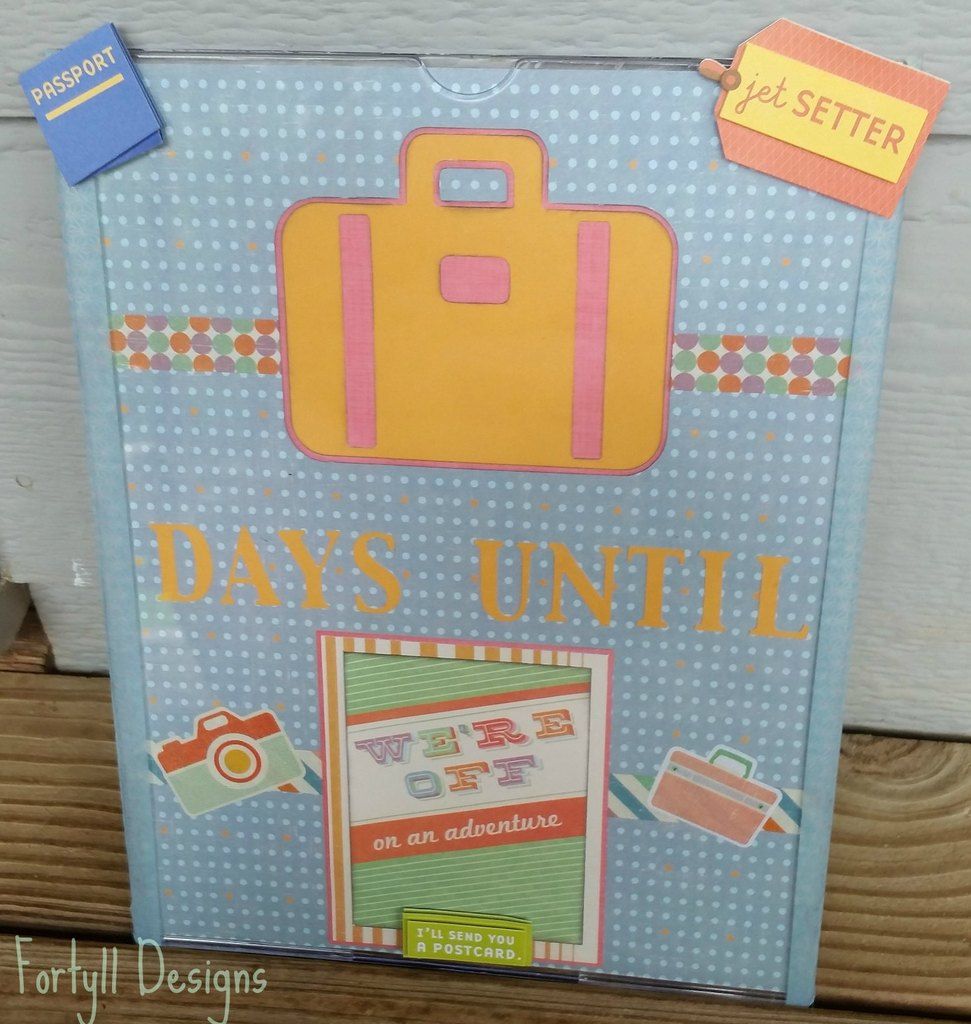
So how about a summer vacation countdown calendar to mark the days until your getaway?
I used the Deflecto sign holder that is made especially for cubicles (it comes with mounting clips, Velcro, and magnets so that you can mount it almost anywhere). Won't your co-workers be jealous of your upcoming adventure and your cool calendar? Just keep track of the days with a dry-erase marker, writing the days left on top of that cute little die-cut suitcase.
So where are you going this summer?
Materials used: "Going Places" and "Base Camp" Cricut cartridges We R Memory Keepers "Jet Set" collection SEI paper and washi tape K and Co. dimensional stickers
Disclosure: This is a sponsored post. As a member of the Deflecto Design Team I have been provided product in exchange for my creative ideas, views and opinions.
Joy S.A. Embroidered Letters & Appliques for Wearables & Home Decor
I am pleased to announce that I am going to be a part of the "Creating with Joy" ambassador team. Joy S. A. Inc. makes awesome embroidered applique letters and designs that make any project beautiful.
Joy S.A. is sponsoring a blog hop with Designer Crafts Connections so be sure to check out all the amazing projects from the other designers. Use the arrows beneath the logo in my sidebar to the right to navigate the web ring. And there is a new blog that where we will be sharing our projects each month -- check it out here!
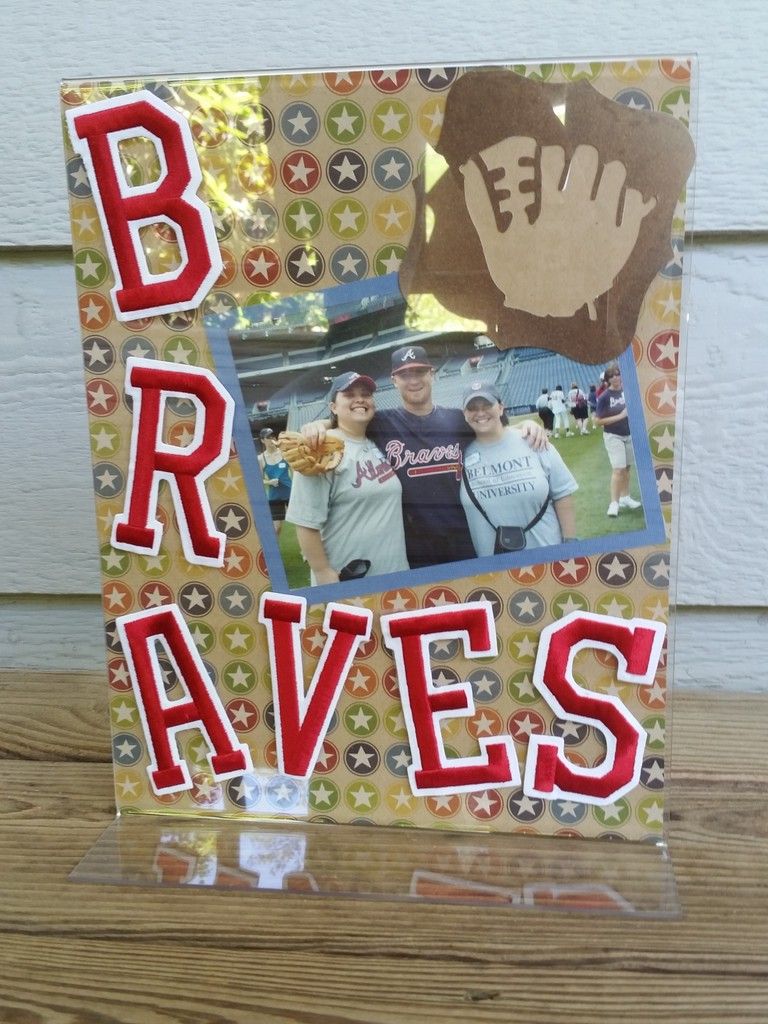
Here's my project!
I am a huge Atlanta Braves fan, so I wanted to make a frame to feature my favorite teamI just added the Joy 3" Varsity Letters in red to a clear acrylic frame from Deflecto to go from plain to fab! These letters are gorgeous! The embroidery is beautiful and the adhesive really sticks, making them a great way to personalize almost anything.
Disclosure: This is a sponsored post. As a member of the Deflecto Design Team I have been provided product in exchange for my creative ideas, views and opinions.
We just celebrated our moms on Mother's Day, so now let's turn our attention to the dads out there!
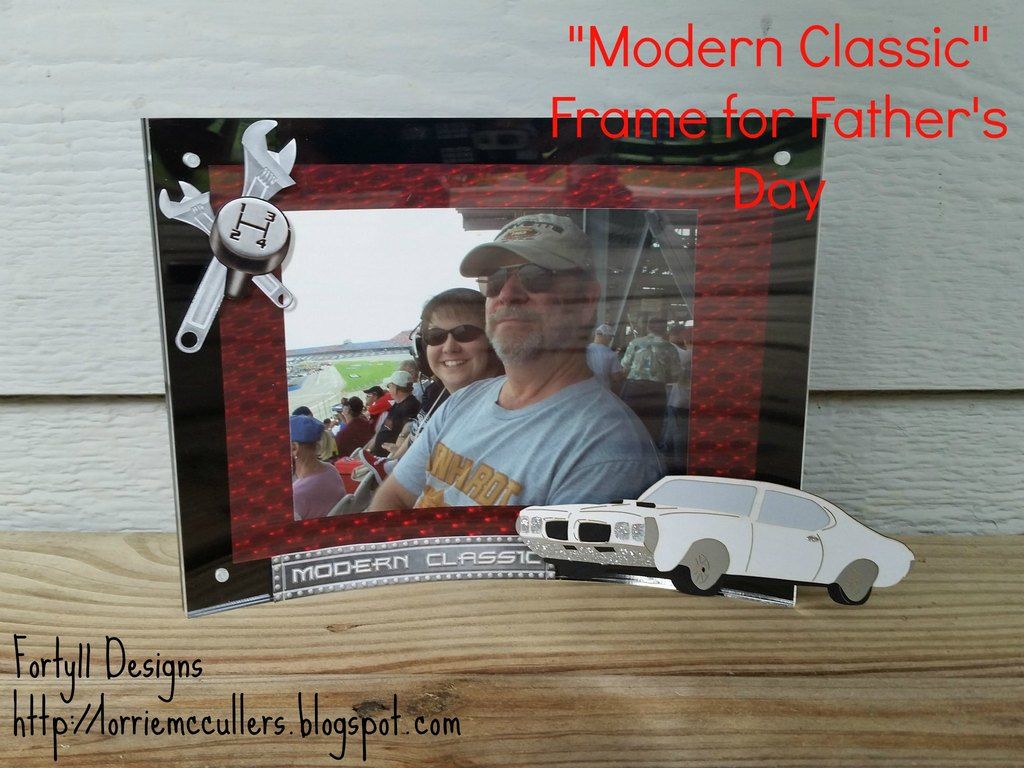
For this Father's Day, I am giving my dad something that combines two of his loves: me and cars! You see, my dad has always loved cars. He knows more about cars than almost anyone I know, Because of him, I have attended lots of classic car shows, drag races, and NASCAR races, and I have loved every minute of it too.
The picture above is me and my dad at a NASCAR race at Talladega a few years ago. The picture needed a cool frame to go with it, and the Deflecto curved magnetic frame was just right. (By the way, this frame is so neat because the frame snaps together with magnets and the photo just "floats" between the two panels.) I placed my photo on Rowlux Illusion Film and placed it in the frame. Then I added some fun car-themed stickers and die-cuts to the frame itself to give it a "high-octane" look!
So if your dad is a car guy, give him a gift that will rev his engine!
Materials used: Deflecto curved magnetic frame (5"x7") Rowlux Illusion Film in Red 3-D Die Cuts with a View car die cut Creative Imaginations stickers Studio G by Hampton Art glitter glue Glue Dots adhesive Disclosure: This is a sponsored post. As a member of the Deflecto Design Team I have been provided product in exchange for my creative ideas, views and opinions.
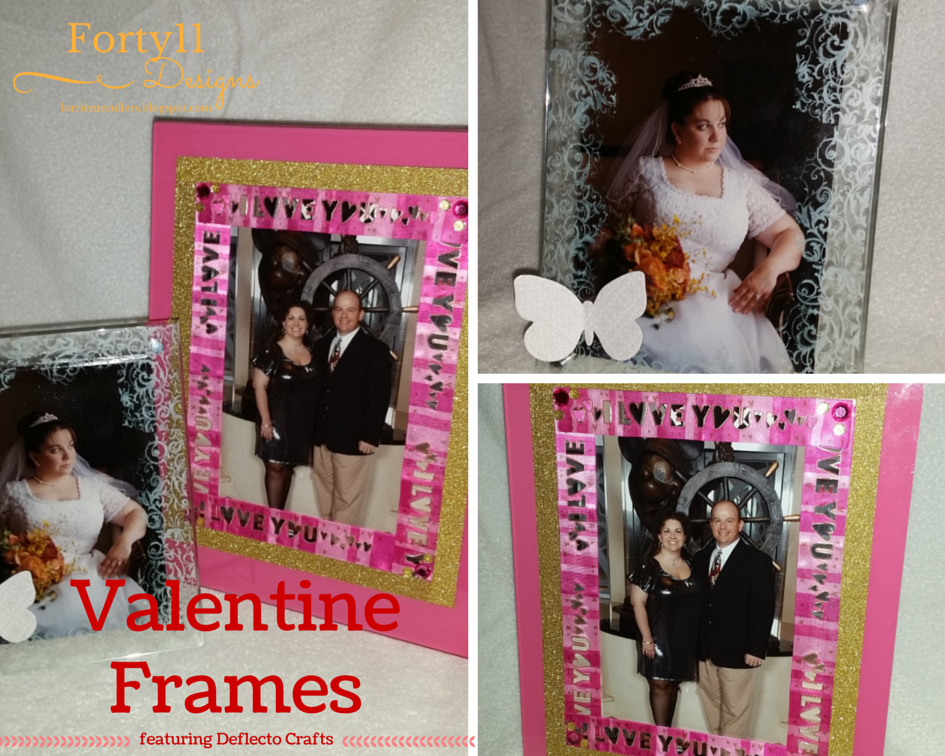
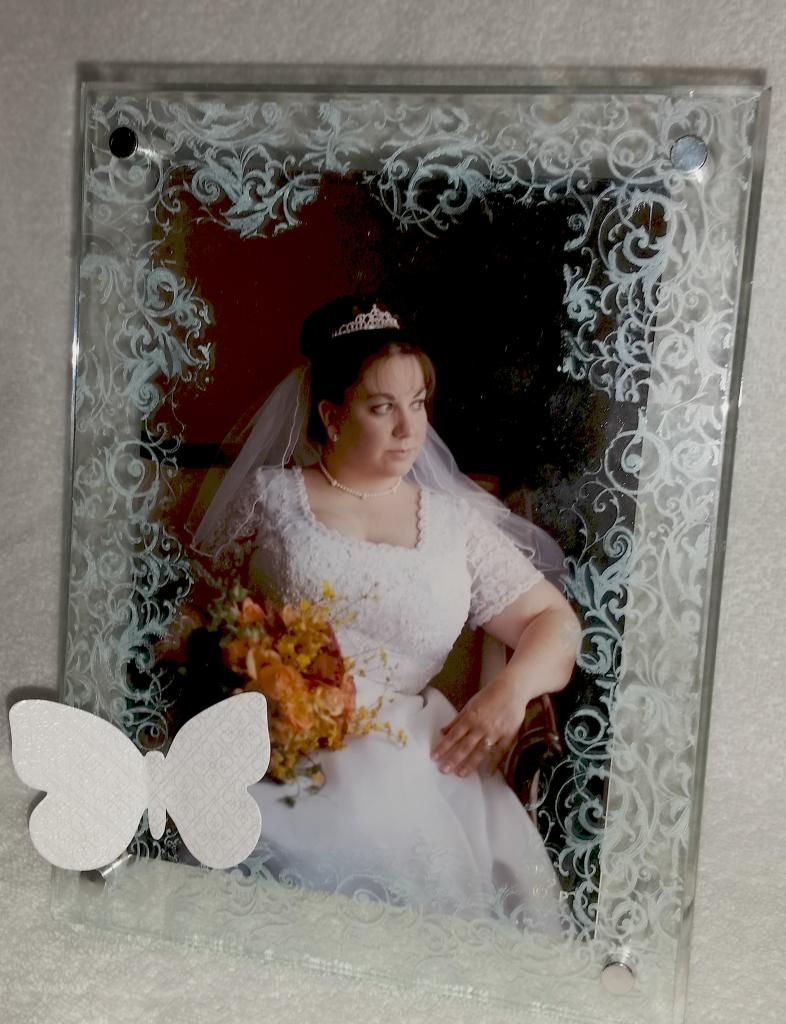
It's February and love is in the air... and I am in love with these frames!
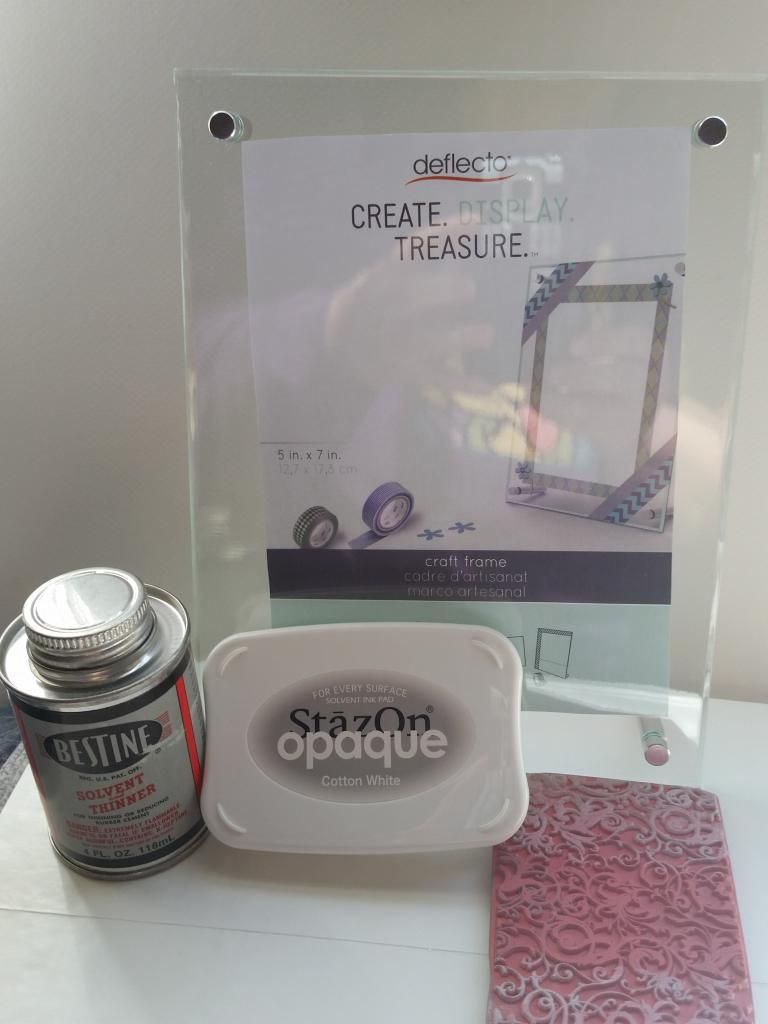
For the first frame, I used this cool beveled edge frame from Deflecto. I stamped directly onto the frame with white Staz-On ink.
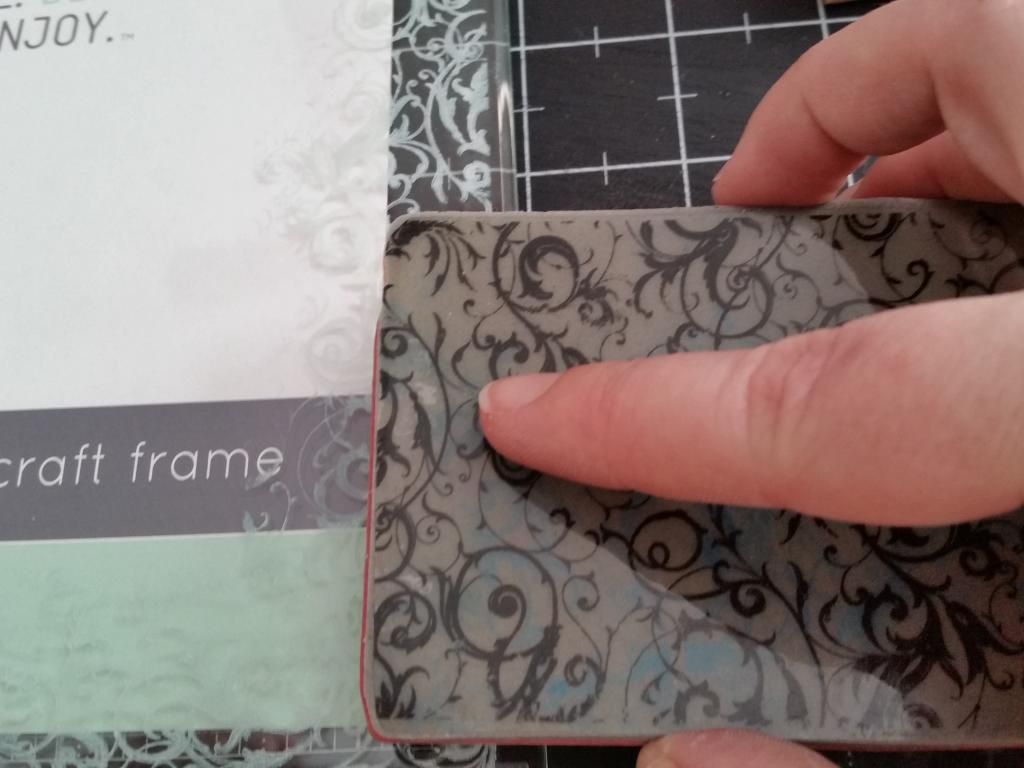
I used a background stamp from Hero Arts and just used the edges to stamp around the edges of the frame.
Never stamped on acrylic before? It's easy! Just make sure you use a solvent-based ink like Staz-On. Mess up? No problem! I use a product called Bestine which is a paint thinner/solvent on a paper towel -- the ink wipes right off.
I love this technique because it gives the look of glass etching.
The next frame was inspired by the big trend at this year's CHA show: GOLD!
I used a pink-edged acrylic frame for my base. I added gold glitter tape from Darice around the edges of the frame opening. I then used ribbon that I have been hoarding for years! It's so cute -- the words "I Love U" are actually cut out of the ribbons and edged in gold. Finally, I added some hot pink and gold bling to each corner of the ribbon.
Here's wishing y'all a wonderful and love-filled Valentine's Day!
Disclosure: This is a sponsored post. As a member of the Deflecto Design Team I have been provided product in exchange for my creative ideas, views and opinions.
It may be the beginning of a new year, but I am feeling a little retro! This month, I decided to give a Deflecto wet-erase sign a vintage feel.
Deflecto makes these beautiful display signs that you can use with Deflecto's wet erase chalkboard markers. They start out looking like this.
To make the sign look vintage, I painted it with DecoArt Americana Decor Chalky Finish Paint. It is an ultra-matte paint that leaves a gorgeous finish. I used a foam brush and very little paint, almost a dry brush technique, so that a little of the wood finish would show through.
I covered the black wet-erase sign surface with paper from Graphic 45's "Little Darlings" collection from a few years back -- it is still my favorite vintage baby collection! I then accented it with a small piece of canvas, a metal filigree embellishment, a button, and a bit of vintage ledger paper.
And who is that cute baby? Well, I don't know! You see, I love to buy old photos at flea markets, antique shops, and the like. Consider it store-bought ancestors -- how else can you choose your own relatives?! I especially love old baby photos; I love to make up stories about them and who they might have been. I decided to call this sweet baby Ruby Sue!
Disclosure: This is a sponsored post. As a member of the Deflecto Design Team I have been provided product in exchange for my creative ideas, views and opinions.
Decoden is a trend from Japan! The term "deco" is short for decorated and "den" is short for "denwa" meaning "phone" in Japanese. This craze has swept the crafting world!
My husband and I recently took a trip to Walt Disney World and that place is "Frozen" crazy. Olaf the snowman, Elsa, and Anna were everywhere! We had our picture taken with the Olaf outside Hollywood Studios -- I thought this would be a great jumping off point for my own project.
I had the pleasure of trying out DecoDen Bling from Signature Crafts (provided to me by the company) and I loved it! It's a dimensional paste that comes in these cool squeeze tubes and you apply it with decorative tips, just like you would use on a cake! The paste comes in 9 colors which makes it so versatile and it's nice and thick so it will hold any sort of bling you want to add to your project.
I started with a fun acrylic easel frame from Deflecto Crafts. I used the star tip and the white DecoDen Bling paste to go around the edge of the frame so that it looks almost like snowflakes. I then used the turquoise paste to add a little color to the "snowflakes". Finally, I added a glitter snowflake (that was an ornament until I snipped off the string!).
I then placed our picture on Rowlux Illusion Film and put it in the frame! That's it!
This was a fun and totally easy project that you could do with kids (a "Frozen" party activity, maybe?).
Disclosure: This is a sponsored post. As a member of the Deflecto Design Team I have been provided product in exchange for my creative ideas, views and opinions.
Every year, I host Thanksgiving here at my house. Even though I am only cooking for 5 people, I make enough food for at least twice that so the saying "Gobble 'Til Ya Wobble" takes on real meaning this time of year!
I dressed up the first with some pretty ribbon from Webster's Pages and a cornucopia sticker that I mounted on chipboard.
On the second, I attached a little paper-pieced turkey on an embossed background and then put the whole thing on the chalkboard.
These easels are so cool -- the wooden legs are a beautiful wood and the chalkboard surface is a black plastic-like material that you can clean off with just water (which is great if you don't like your handwriting and you have to erase it a hundred times to make it look right... not that I would know anything about that). Those people at Deflecto are geniuses, I tell you!
I hope all of you have a fantastic Thanksgiving!
Materials used: Deflecto chalkboard easels and chalk markers (provided by Deflecto) Ribbon by Webster's Pages Adhesive by Thermoweb Sticker unknown Paper piecing -- this pattern came from an online source but I don't know where! If you know the creator of this pattern, let me know so I can attribute it to him/her!
Disclosure: This is a sponsored post. As a member of the Deflecto Design Team I have been provided product in exchange for my creative ideas, views and opinions.
My project this month for the Deflecto design team is something that we can all use in the upcoming holiday season - quick and easy card holders!
I love to display the Christmas cards we get from family and friends, but I am always at a loss as to how to show them off. When I saw the VersaGrip magnetic sign holders and angled sign holders, I knew that I could turn them into a holiday-rific solution!
The first sign holder I altered was the angled sign holder. They start out looking like this:
Photo: Deflecto.com
With just a small plastic snowflake ornament from Michaels and a couple of glue dots, it turns into a simple but cute card holder!
The other Deflecto product that I used was the VersaGrip magnetic sign holders.
Photo: Deflecto.com
On this holder, I added some tinsel and a piece of a vintage plastic floral spray (I adore vintage Christmas stuff!).
For a finishing touch, I made a "Merry Christmas" sign using Deflecto's chalkboard-look sign tags! These tags are so cool -- they can be cut to size and you can clean off the ink from the included pen with water.
I decorated the other holder with mini ornaments I picked up at Michaels and some clear tinsel.
I hope that these have inspired you! You can use so many different bits and baubles to turn these sign holders into a cool part of your holiday decor!
Materials used:
sign holders and sign tags - Deflecto
mini ornaments - Michaels
adhesive - Thermoweb
tinsel and vintage spray from my stash!
Disclosure: This is a sponsored post. As a member of the Deflecto Design Team I have been provided product in exchange for my creative ideas, views and opinions.
I am so excited to be a member of the very first Deflecto USA Ambassador Design Team!
Deflecto has always been in the business of items like office organization, chair mats, and literature displays. But now, they are venturing into the arts and crafts industry with cool acrylic frames, magnetic sheets, craft storage, and more!
For our first project, the team got to work with some of Deflecto's new acrylic frames. The frames come in tons of sizes, from 1 1/2" x 2" all the way up to 12 x 12. The frames also come in different types, including magnetic, stand-up, and hanging frames.
I was so excited to make something with these frames that I made TWO projects!
The first is a Disney countdown calendar. The best part of this calendar is that it's a dry erase calendar so you can easily change the days as your vacation gets closer. Dry erase markers work amazingly well on these frames!
I edged the sides with washi tape from Queen and Co. and the top and bottom with Queen and Co. ribbon. The interior of the frame is scrapbook paper embellished with letter stickers and a die-cut. Since the days are written in with a dry erase marker, you never have to move the paper inside the frame!
The second project is a Disney frame (featuring me and my wonderful husband on one of our Disney cruises). I started with a 6x9 black-edged frame and then embellished it with Plaid Mod Melts! (If you have never seen Mod Melts, check out my posts about them here and here.)
These Mod Melt letters are so fun to make and can be adhered easily with glue dots.
The balloons and the banner are also Mod Melts that I painted with acrylic paint, embellished with twine, and adhered with glue dots.
These Deflecto frames are so much fun to work with! You can use them for so much more than just picture frames too. For more awesome ideas, please go check out our design team Pinterest page!
Disclosure: This is a sponsored post. As a member of the Deflecto Design Team I have been provided product in exchange for my creative ideas, views and opinions.
Sometimes, as a crafter, I get stuck for inspiration. Today, I took "getting stuck" literally...
I decided to make some cute magnets and memo board!
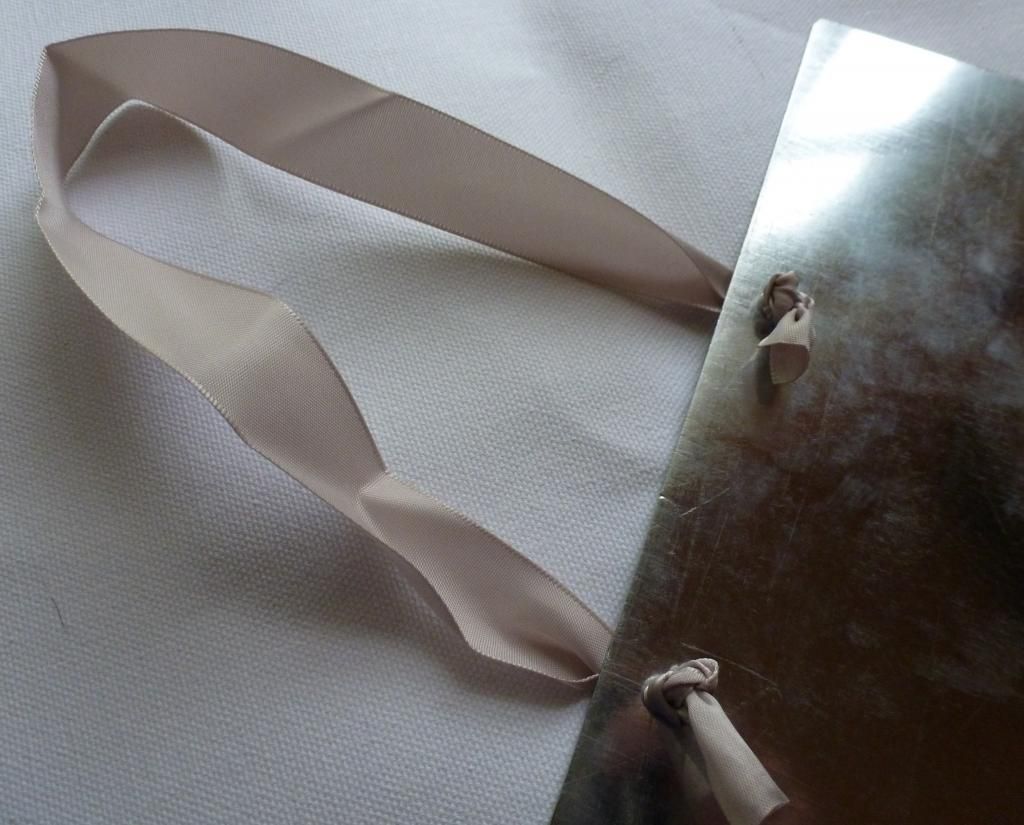
I started with a metal sheet from my craft stash, ribbon from DoCrafts, magnets from The Magnet Source, and fabric-covered buttons from Traditions "Explorer" collection that I got on clearance (y'all know I love to save money!).
First, I punched holes in the metal sheet with my Crop-A-Dile Big Bite. The metal is thin so punching was no problem. I then chose an ivory ribbon and put it through the holes, double-knotting it on the back, to make a hanger.
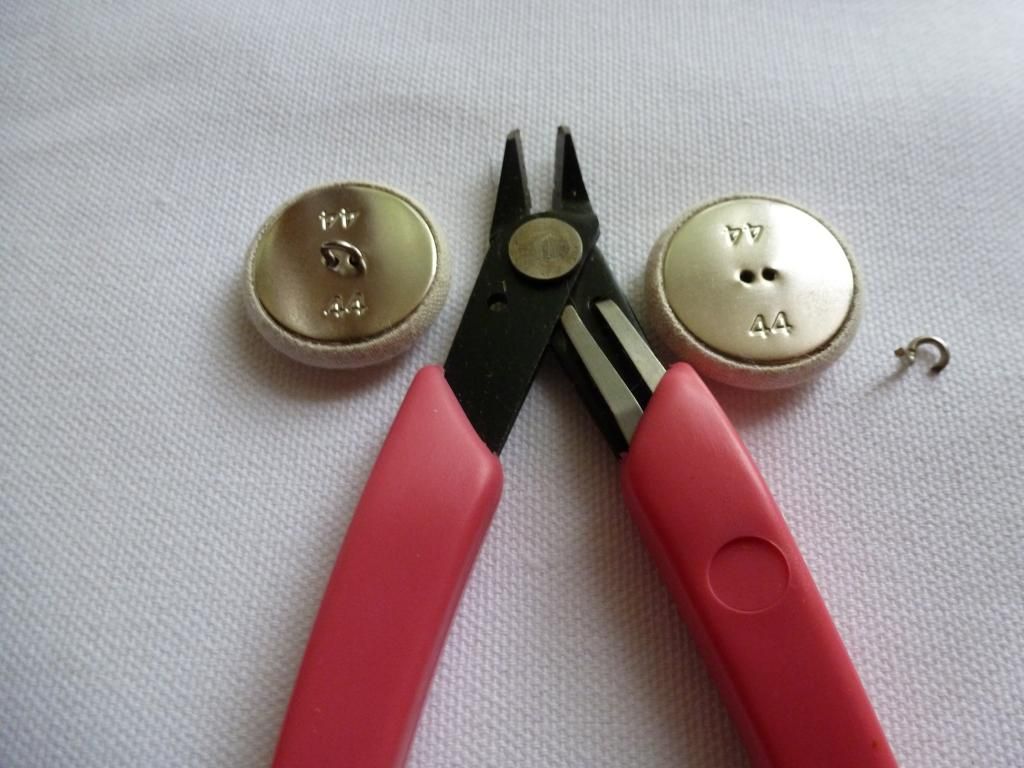
Then I got to work on the magnets. The buttons I used were actually found in the beading/jewelry section! They had a shank on the back so I cut those off with a shank remover.
By the way, if you don't have a shank remover, do yourself a favor and get one. I love using buttons on my scrapbook pages and other crafts, but I don't want the big shank on the back. This tool cuts them off easily.
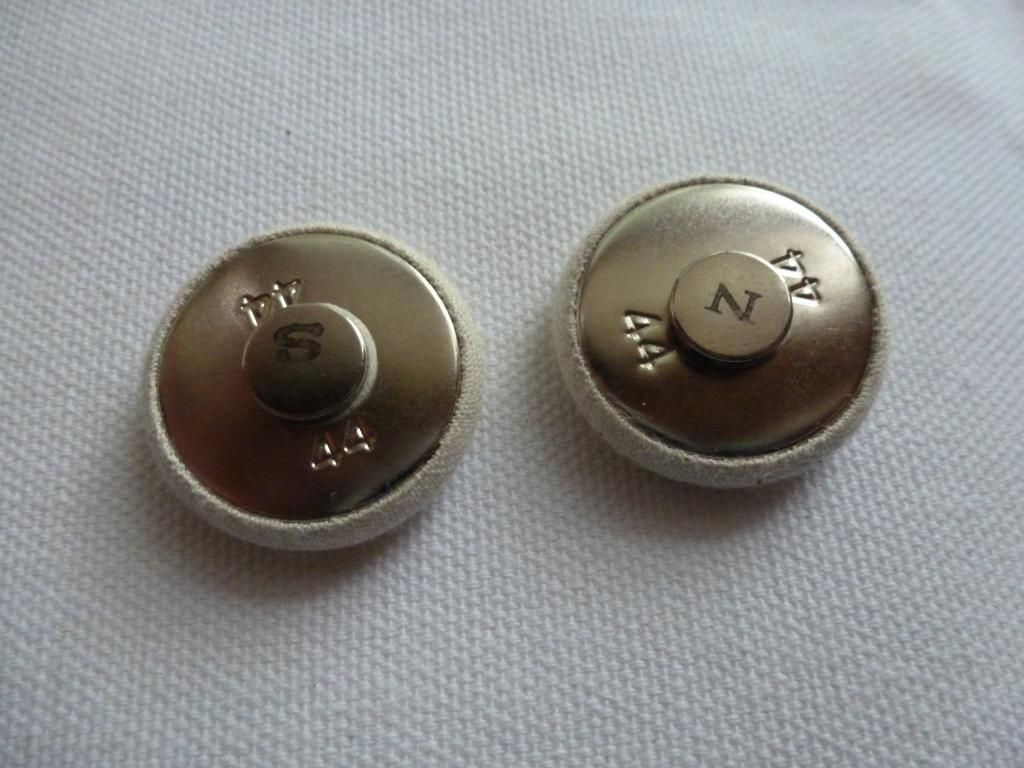
I then put magnets on the back of the buttons. These magnets from The Magnet Source already have adhesive on the back (so handy!) so no glue is required.
And that's it!
And you can make magnets out of just about anything. I started sticking magnets on all sorts of items.
This quick craft project would be great to hang almost anywhere -- in an office, a cubicle, or a teen's room.
Hope you enjoyed this post and can't wait to share more with you!
Since the project uses magnets, it is not recommended for small children.
Thanks to The Magnet Source and DoCrafts for supplying the magnets and ribbon used in this project. Though I received these products for free, all thoughts and opinions are my own.


%2Bteam%2B%2Bbadge%2B(2).png)