Monday, May 11, 2015

Father's Day Car Guy Frame


We just celebrated our moms on Mother's Day, so now let's turn our attention to the dads out there!

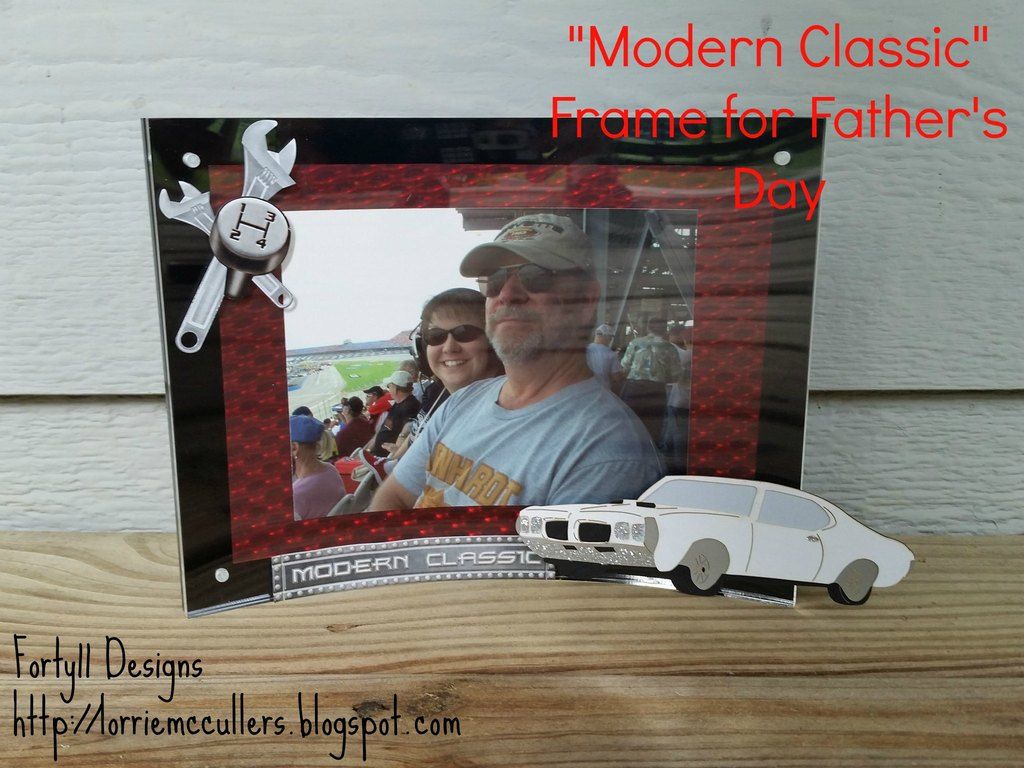
For this Father's Day, I am giving my dad something that combines two of his loves: me and cars! You see, my dad has always loved cars. He knows more about cars than almost anyone I know, Because of him, I have attended lots of classic car shows, drag races, and NASCAR races, and I have loved every minute of it too.

The picture above is me and my dad at a NASCAR race at Talladega a few years ago. The picture needed a cool frame to go with it, and the Deflecto curved magnetic frame was just right. (By the way, this frame is so neat because the frame snaps together with magnets and the photo just "floats" between the two panels.) I placed my photo on Rowlux Illusion Film and placed it in the frame. Then I added some fun car-themed stickers and die-cuts to the frame itself to give it a "high-octane" look!

So if your dad is a car guy, give him a gift that will rev his engine!

Materials used:
Deflecto curved magnetic frame (5"x7")
Rowlux Illusion Film in Red 3-D
Die Cuts with a View car die cut
Creative Imaginations stickers
Studio G by Hampton Art glitter glue
Glue Dots adhesive

Disclosure: This is a sponsored post. As a member of the Deflecto Design Team I have been provided product in exchange for my creative ideas, views and opinions.

Monday, April 20, 2015

Mother's Day Masterpiece Magnet


May will be here before you know it, and with it comes Mother's Day!

My mom always loved the gifts I made for her the most (and she still does), and I think most moms are the same way. So this month's Deflecto Crafts project is a fun gift for moms that they will love and kids will love to make!

I started with the Deflecto customizable magnetic craft sheets. These sheets are so easy to use! They have a white facing to them that can be painted, inked, covered with paper... you name it. They can also be easily cut with scissors and craft knives and you can use punches and die cut machines. (These sheets are being rolled out to stores soon -- ask your local craft store to carry them!)


I just used a ruler, a permanent marker, a pair of scissors, and a craft knife (for the center) to cut out my frame, making it 4" x 5". The great thing about this simple frame is that you can let kids make whatever design they want using markers or paint, drawing directly on the white surface. I used Copic and Spectrum Noir markers, giving my frame a little bit of a stained glass look.

For the finishing touch, I put a school picture in the frame and added a little tag that says "Happy Mother's Day from your little masterpiece!"

And yes, that little girl in the picture is me in the 3rd grade!

Materials used:
Deflecto magnetic craft sheets
Copic and Spectrum Noir markers
Fiskars Amplify mixed media scissors
Fiskars fingertip craft knife
Martha Stewart Crafts permanent marker

Disclosure: This is a sponsored post. As a member of the Deflecto Design Team I have been provided product in exchange for my creative ideas, views and opinions.

Tuesday, March 24, 2015

Springtime Gypsy Earrings


This year, I was lucky enough to be invited to the Blogger Networking Event at CHA (hosted by FaveCrafts). This is an opportunity for us bloggers to meet with crafting manufacturers so we can get the word out to you readers about new and awesome products.

One of my favorite products from the event had to be the sweet treasure trove of Swarovski crystals from PrimaBead.com. I am like a magpie -- I adore anything sparkly! I used some of these gorgeous crystal beads to make a pair of gypsy-inspired earrings. These earrings are super-easy to make; if you can open and close a jump ring, you can make these!

Springtime Gypsy Earring Instructions:

  1. Start with a chandelier-type earring finding.
  2. For outer beads, place 3 bicone beads on a head pin. Create a loop at the top of the head pin and attach to the earring with a jump ring.
  3. Attach the rest of the crystals to your earring with jump rings.
  4. Attach earring to earwires (I didn’t use a jump ring so that the earring would face forward. If you prefer your earrings to swing sideways, use a jump ring.).

Materials List:

  1. Swarovski crystal beads (I used these, these, these, and these.)
  2. Chandelier earrings (I got mine at Hobby Lobby -- there are lots of different styles to choose from).
  3. Earwires, jump rings, and head pins (Again, I got all my findings at Hobby Lobby).
  4. Round-nose jewelry pliers
I would love to see your version of these earrings! If you like these, pin them on Pinterest!


Wednesday, March 11, 2015

Wearing o' the green!

It's March which means it's time for St. Patrick's Day! It's also National Craft Month so it's also time to make something. So let's go green!


I decided that for this month's Deflecto design team project, my frames needed to wear the green! And I got to decorate my frames with the decorating items that I love most: washi tape, buttons, and (my new favorite) glass stones.


My first frame was already decked out in green; it's one of Deflecto's cool acrylic frames with a color border. Then I just added green-striped washi tape and lots of buttons in all shades of green. 


My second frame was a just clear acrylic frame that got jazzed up by some green glass stones. The best part about these stones? They came from the Dollar Tree! Yep, a big bag of these beauties were only $1. They may have been inexpensive, but they look like a million bucks! They were so easy to attach too; I put a thin line of Beacon Quick Grip adhesive around all four edges and stuck the glass on (the quick grab of this adhesive means this frame was ready to go in about 15 minutes).

But of course, a frame is just a frame without a picture, right? I am especially proud of these photos as they were taken in Ireland. The "Leprechaun Crossing" sign was taken at Killarney National Park in Co. Kerry, Ireland. The photo of my husband and me was taken near Dingle in western Ireland. We are posing with a ogham (pronounced "ohm") stone. An ogham stone is an upright stone inscribed with the lines and notches of the early Irish ogham alphabet. This stone has a hole in it; people would use these stones with holes as a way to make deals. If you touched fingers through the hole in the stone, the was binding until death.

Materials used:
Frames: Deflecto
Washi Tape: Darice
Glass stones: Dollar Tree
Buttons: miscellaneous

Disclosure: This is a sponsored post. As a member of the Deflecto Design Team I have been provided product in exchange for my creative ideas, views and opinions.

Monday, February 2, 2015

Valentine Frame Projects


It's February and love is in the air... and I am in love with these frames!

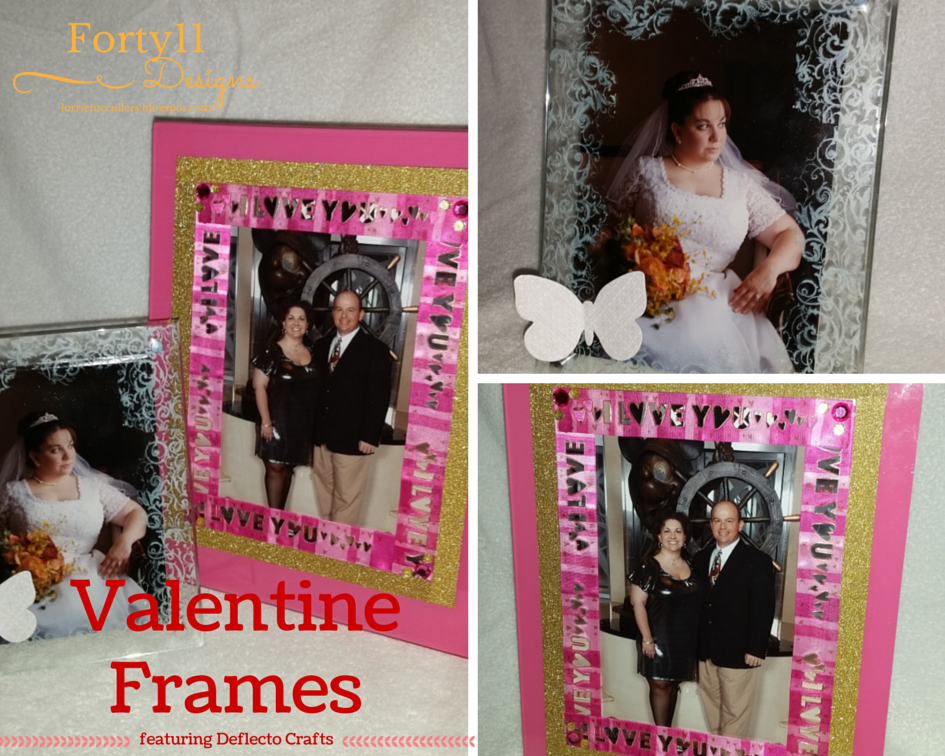
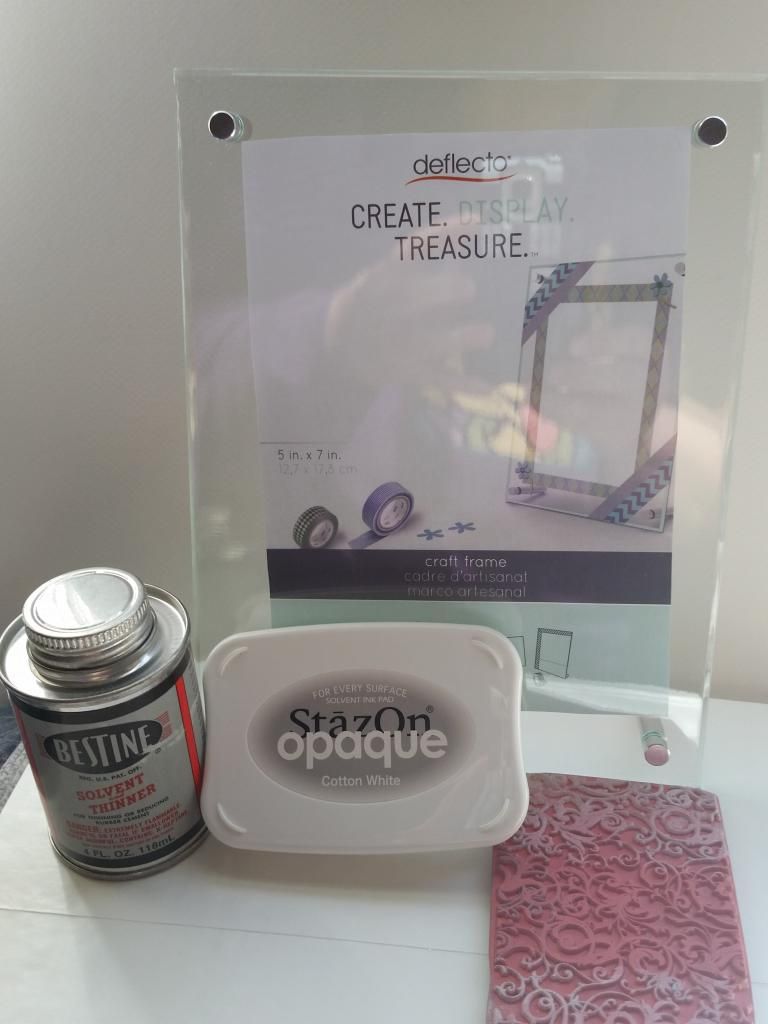
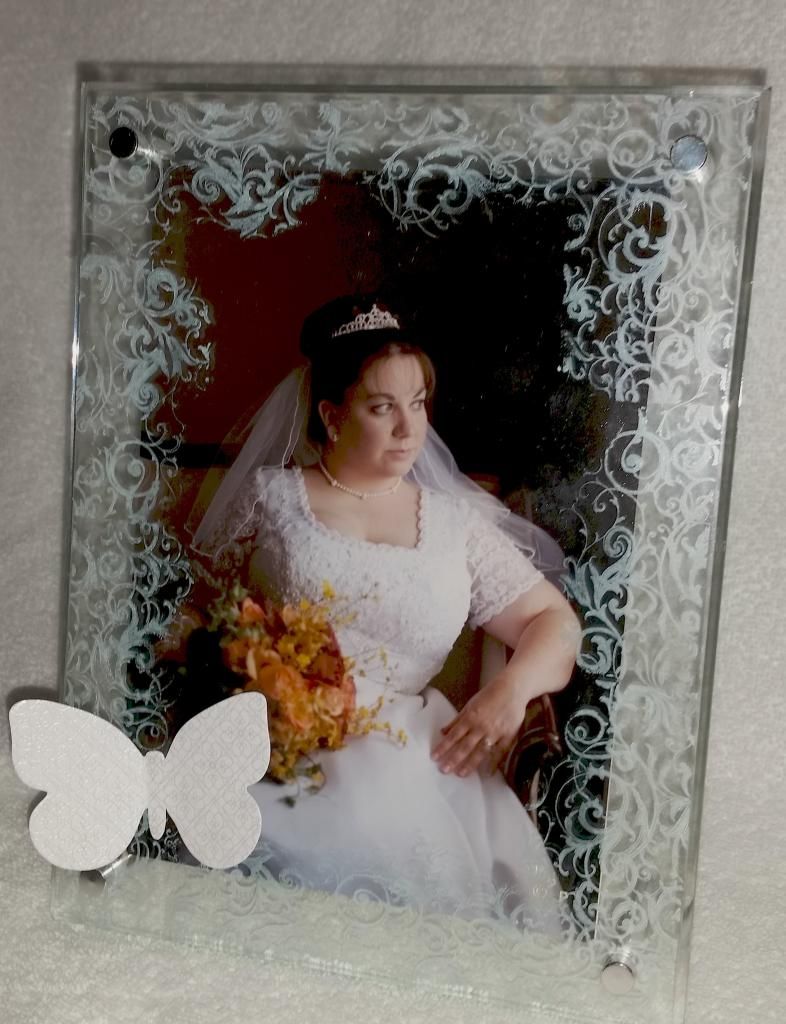
For the first frame, I used this cool beveled edge frame from Deflecto. I stamped directly onto the frame with white Staz-On ink.


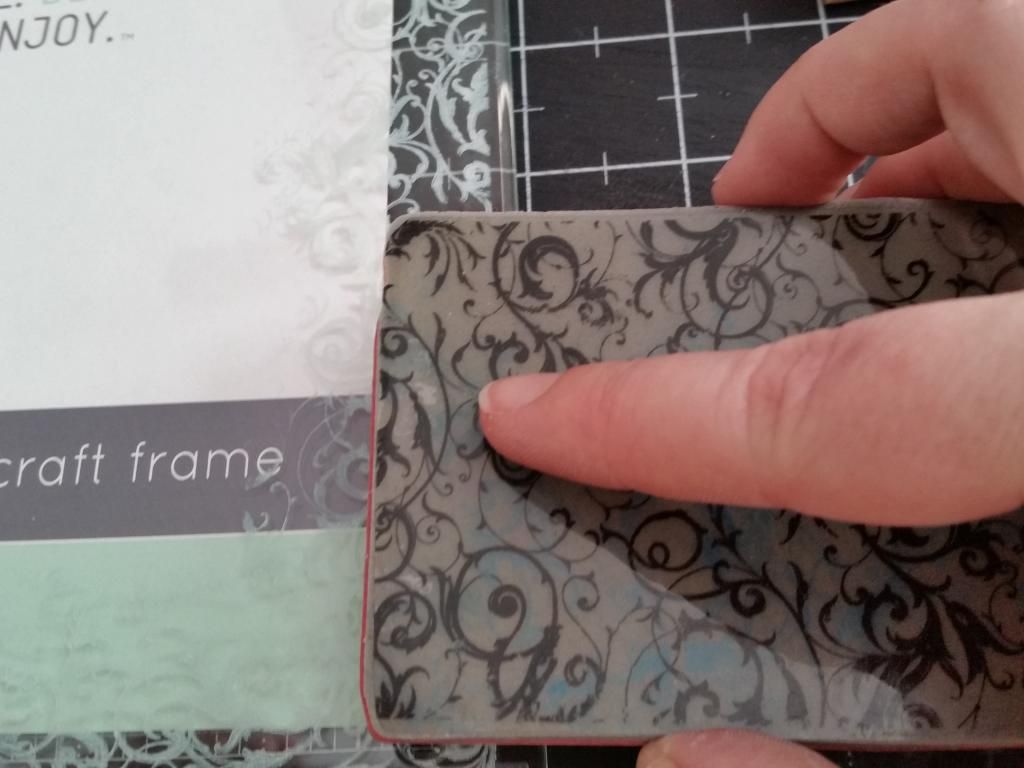
I used a background stamp from Hero Arts and just used the edges to stamp around the edges of the frame.

Never stamped on acrylic before? It's easy! Just make sure you use a solvent-based ink like Staz-On. Mess up? No problem! I use a product called Bestine which is a paint thinner/solvent on a paper towel -- the ink wipes right off.


I love this technique because it gives the look of glass etching.

The next frame was inspired by the big trend at this year's CHA show: GOLD!


I used a pink-edged acrylic frame for my base. I added gold glitter tape from Darice around the edges of the frame opening. I then used ribbon that I have been hoarding for years! It's so cute -- the words "I Love U" are actually cut out of the ribbons and edged in gold. Finally, I added some hot pink and gold bling to each corner of the ribbon.

Here's wishing y'all a wonderful and love-filled Valentine's Day!

Materials used (stamped frame):
Deflecto Crafts bevel edge frame
Staz-On Ink from Tsukineko
Butterfly embellishment from SEI
Thermoweb adhesive Zots

Materials used (pink frame):
Deflecto Crafts acrylic frame
Gold glitter tape from Darice
ribbon
Twinkle Goosebumps embellishments from Queen and Co.
Pink rhinestones from Want2Scrap
Thermoweb adhesive Zots

Disclosure: This is a sponsored post. As a member of the Deflecto Design Team I have been provided product in exchange for my creative ideas, views and opinions.

Monday, January 26, 2015

Vintage Baby Collage Project

It may be the beginning of a new year, but I am feeling a little retro! This month, I decided to give a Deflecto wet-erase sign a vintage feel.


Deflecto makes these beautiful display signs that you can use with Deflecto's wet erase chalkboard markers. They start out looking like this.


To make the sign look vintage, I painted it with DecoArt Americana Decor Chalky Finish Paint. It is an ultra-matte paint that leaves a gorgeous finish. I used a foam brush and very little paint, almost a dry brush technique, so that a little of the wood finish would show through.

I covered the black wet-erase sign surface with paper from Graphic 45's "Little Darlings" collection from a few years back -- it is still my favorite vintage baby collection! I then accented it with a small piece of canvas, a metal filigree embellishment, a button, and a bit of vintage ledger paper.

And who is that cute baby? Well, I don't know! You see, I love to buy old photos at flea markets, antique shops, and the like. Consider it store-bought ancestors -- how else can you choose your own relatives?! I especially love old baby photos; I love to make up stories about them and who they might have been. I decided to call this sweet baby Ruby Sue!

Materials used:
Deflecto wet-erase sign
DecoArt Americana Decor Chalky Finish Paint in "Vintage"
Graphic 45 patterned paper
Canvas Corp. canvas rectangle
Recollections metal filigree embellishment
ColorSnap Colorbox Chalk Ink in "Chestnut Roan"
Scotch ATG adhesive
Thermoweb Zots adhesive

Disclosure: This is a sponsored post. As a member of the Deflecto Design Team I have been provided product in exchange for my creative ideas, views and opinions.

Friday, December 12, 2014

"Frozen" Frame with DecoDen Bling and Deflecto!

Have you gotten in on the decoden trend yet?

Decoden is a trend from Japan! The term "deco" is short for decorated and "den" is short for "denwa" meaning "phone" in Japanese. This craze has swept the crafting world!

My husband and I recently took a trip to Walt Disney World and that place is "Frozen" crazy. Olaf the snowman, Elsa, and Anna were everywhere! We had our picture taken with the Olaf outside Hollywood Studios -- I thought this would be a great jumping off point for my own project.

I had the pleasure of trying out DecoDen Bling from Signature Crafts (provided to me by the company) and I loved it! It's a dimensional paste that comes in these cool squeeze tubes and you apply it with decorative tips, just like you would use on a cake! The paste comes in 9 colors which makes it so versatile and it's nice and thick so it will hold any sort of bling you want to add to your project.

I started with a fun acrylic easel frame from Deflecto Crafts. I used the star tip and the white DecoDen Bling paste to go around the edge of the frame so that it looks almost like snowflakes. I then used the turquoise paste  to add a little color to the "snowflakes". Finally, I added a glitter snowflake (that was an ornament  until I snipped off the string!).


I then placed our picture on Rowlux Illusion Film and put it in the frame! That's it! 

This was a fun and totally easy project that you could do with kids (a "Frozen" party activity, maybe?).

Disclosure: This is a sponsored post. As a member of the Deflecto Design Team I have been provided product in exchange for my creative ideas, views and opinions.

Wednesday, November 26, 2014

Lee Greenwood's Favorite Dessert

More than 30 years ago, my mom found a recipe in the newspaper for "Lee Greenwood's Favorite Dessert" (you know, the guy who sang "God Bless the USA"?). 
God bless the USA... and this dessert!
It was so good that we have made it for Thanksgiving and Christmas every single year since. And even though it is so flippin' good, we only make it those two times each year -- it makes it more special that way!
I think most people call it "Chocolate Delight", but at our house, it will always be "Lee Greenwood".
So by popular demand, here's the recipe for Lee Greenwood!
I don't know how many this serves. Five, six, ten? It depends on how hungry you are. I make it for five people and there's about half leftover so I guess 10 folks or so.

I also don't know any kind of nutritional information because when it comes to Lee Greenwood, I don't care if it has a jillion calories. But if you are watching your weight, you can always use fat-free/sugar-free instant pudding, low-fat milk, and reduced fat Cool Whip. In fact, this is how I make mine every year and it tastes just as good as the full fat kind

CRUST:
1 1/2 cups all purpose flour 
1 1/3 cup chopped pecans
1 1/4 sticks of butter or margarine, melted
Preheat oven to 325 degrees. Combine ingredients. Press into the bottom of a 9x13 pan (I use the disposable aluminum kind so I can just toss it when the goodness is gone . Bake @ 325 degrees for about 13 minutes. Now I say "about" becuase here's the deal with the crust. It is a delicate thing. You don't want it too "done" or else your pecans will taste all burnt and nasty. You have to watch it very carefully Take it out of the oven when the top of the crust starts looking "dry". Seriously don't overcook it. Then cool the crust completely (like in your fridge) or else the next part won't work right.

Layer One:
12 oz. cream cheese, softened
12 oz. Cool Whip
1 1/2 cup powdered sugar
Combine cream cheese and powdered sugar. Mix well until blended. Then fold in the Cool Whip with a spoon or rubber spatula-thing. You have to fold in the Cool whip by hand because if you mix it in with a mixer, it messes it up. Don't ask me why, it just does. Spread mixture over cooled crust.

Layers Two and Three:
2 small boxes of chocolate instant pudding
2 small boxes of vanilla instant pudding
Make pudding according to "pie directions" on the box. That basically means you make each box with 1 1/3 cups of milk. Now the thing that is important about this is you have to make each box separately. Again, I don't  know why, but it makes a difference in the taste. Hey, I don't argue with Lee Greenwood -- we've been making this for over 30 years. You make the chocolate pudding first, and let it sit in the refrigerator for about 3 minutes. When it just starts to set, pour it on top of the cream cheese/Cool whip layer. Repeat for the second batch of chocolate pudding. Then you make the vanilla pudding (again, one at a time) and put it on top of the chocolate layer. Then stick the whole thing in your fridge and let it get nice and cold. I usually make mine the night before: any recipe that has nuts in it has a better flavor the next day. That's it!

This dessert is so good that your tongue will jump out of your mouth and slap you upside the head. Seriously. I hope this becomes your favorite dessert too!
Oh, and if anyone knows Lee Greenwood, can you ask him if this really is his favorite?
Doesn't that just look like a big old messy pile of goodness?


Images by Freepik