Showing posts with label design teams. Show all posts

Monday, June 5, 2017

Father's Day Baseball Stand

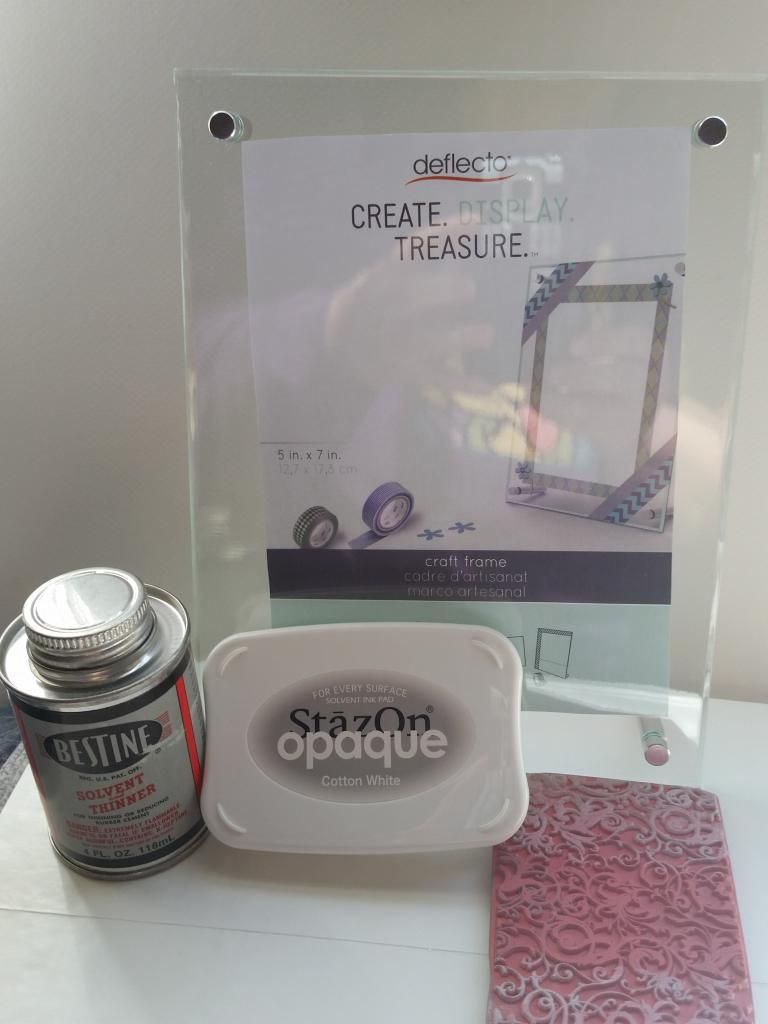
Disclosure: As a member of Deflecto Crafts and Buttons Galore design teams, I received products used in this post fore free in exchange for my ideas and creativity. 


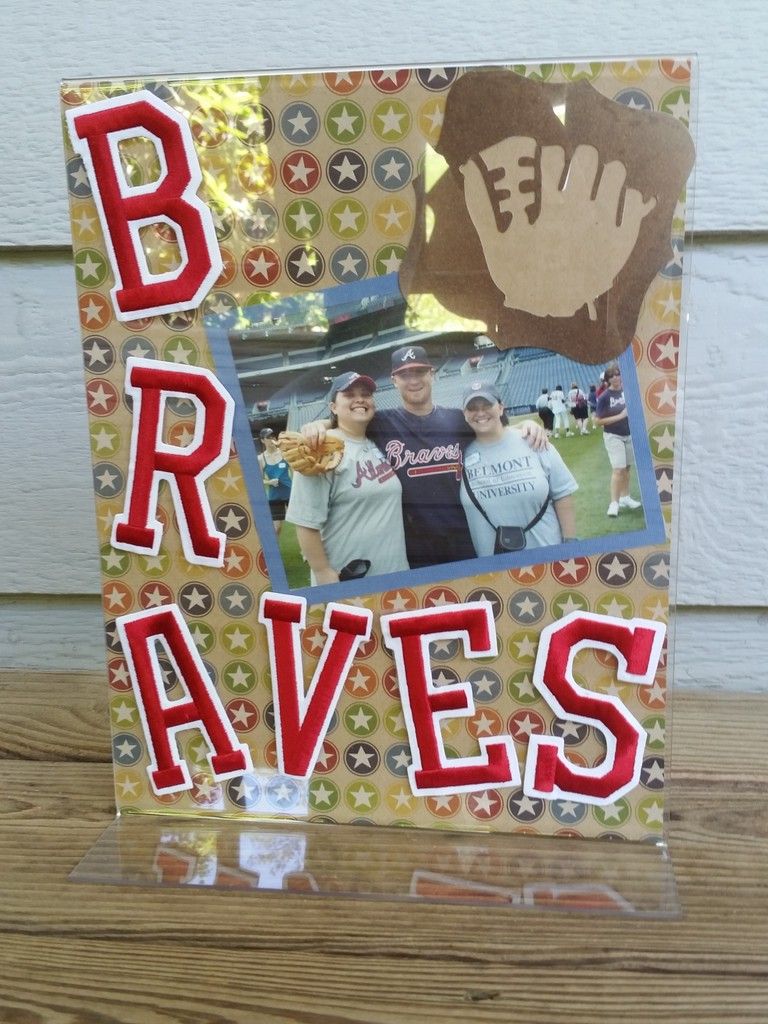
Is your dad or husband a baseball fan? If he is, then I have the perfect project for a Father's Day gift that will "knock it out of the park" -- a place to display his best souvenirs!

Deflecto's Acrylic Display Block is such a cool way to show off your treasures. It's a solid piece of acrylic that is just the right size for displaying smaller items: a baseball fits perfectly on it!

In keeping with the baseball theme, I decorated the display block with these adorable buttons from Buttons Galore. They are so easy to attach to the block -- just put a little dot of hot glue on the back of each button!


I placed a baseball stand on top of the display block to hold the baseball. I actually made it myself using my 3D printer! But if you don't have a 3D printer, you can always keep the ball from rolling off the stand by placing a large metal washer on top of the block (attach with hot glue) and then placing the ball on top of the washer -- the hole in the washer will hold the ball so it won't roll.


Now, Dad has a fun way to display his favorite ballpark memories, either at home or at work!

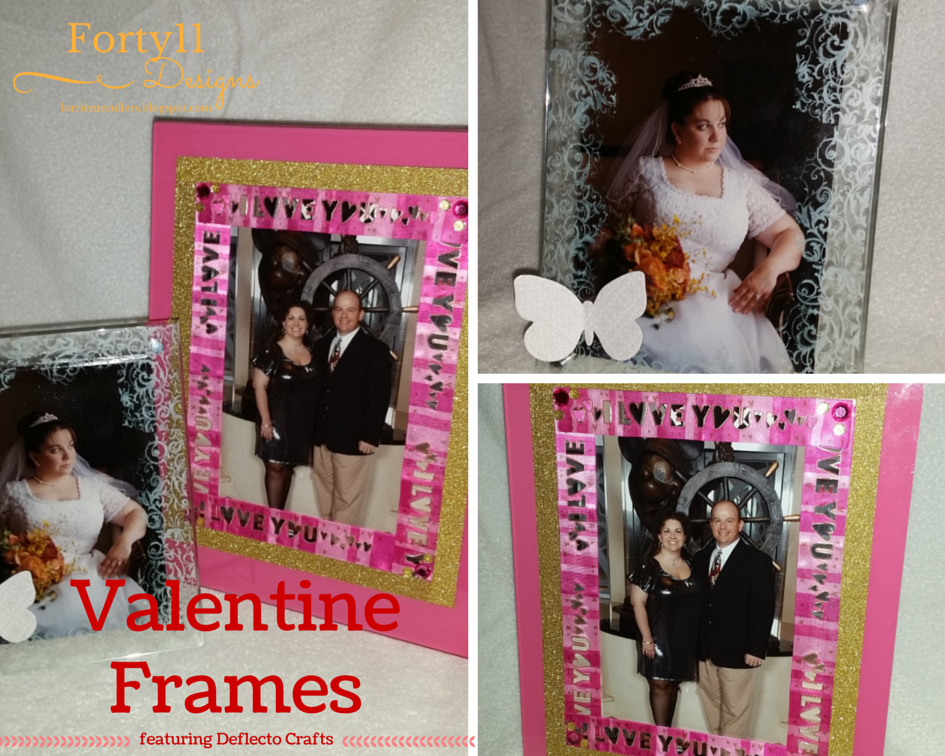
For even more fun projects using Deflecto products, check out the Deflecto Crafts blog. We have such a talented team of designers that make awesome things every month!

Tuesday, May 30, 2017

Exciting news -- New DT's

It's been a busy time over here at Forty11 Designs, and it's just getting busier... and better. I have been named as a brand ambassador for U-Paint Metal Crafts and Buttons Galore!


U-Paint Metal Crafts is an arm of the Frank Morrow Company, designed expressly for DIY craft market. After eleven months of effort, the all-new crafts division features three unique lines for the craft industry and individual DIY crafters.  

I am part of their very first design team and I can't wait to show y'all all the cool uses for these awesome products.


I am also a new member of the brand-new Buttons Galore team! Buttons Galore was established in 1998 primarily as a wholesale distributor of craft supplies. Since inception, the company has evolved into a designer and manufacturer of novelty buttons and other embellishments. 

So be sure to check back here often to see all of the new things that I will be sharing with y'all. Lots of fun and exciting crafts are just around the corner!


Wednesday, November 11, 2015

Thanksgiving Recipe Book


For me, Thanksgiving is all about sharing our bounties with friends and family. And the best way I know how to share is through food. So for my November Deflecto design team project, I wanted to share my favorite holiday recipes in a special book.

Sunday, October 11, 2015

"Boo to You" Candy Holder Sign

Disclosure: This is a sponsored post. As a member of the Deflecto Design Team, I have been provided product in exchange for my creative ideas, views and opinions.


Let's face it: Halloween is all about the candy. This "Boo to You" sign lets you combine candy with a cute decoration that can be used even after the candy is gone!


Friday, October 9, 2015

"The Eyes Have It" Halloween Frame

"Jeepers creepers,
Where'd you get those peepers?"


You are going to think "somebody's watching me" when you make this easy Halloween frame!


Personalized Tote Bag featuring JOY Embroidered Letters


Fall and back-to-school time usually means people are getting ready for football games and tailgating. Not me! I start thinking about all those fun scrapbook events I go to in the fall!

If you are a scrapper like me, chances are you have gone to a crop and there are several people with the same bag that you have. I have a really nice black canvas bag that I got several years ago at a scrapbook store. It's great for crops or shopping, but it looks just like everyone else's bag. Not anymore with the embroidered letters from JOY!

I love these letters because you can just peel off the backing, stick them in place then iron them on to stay permanently. The varsity-style lettering makes your project look sporty and you can use them to spell out words, initials, or your favorite team's name.

And now I can say that I went to my favorite school - SCRAP U! I'll bet no one else has a bag like mine at the next crop!

Tuesday, September 15, 2015

Magnetic Baseball Standings Board


One thing that people may not know about me is that I am a big baseball fan. I love my Atlanta Braves! Growing up in Georgia, we have seen the Braves go from worst to first... and unfortunately, this year, back to worst. However, no matter if the Braves are in the race for the pennant or not, I still love to follow the sport. And with my new Major League Baseball standings board featuring Deflecto magnetic craft sheets, I can keep track of all the teams in baseball!


Thursday, August 13, 2015

Back to School Frame with Deflecto and Buttons Galore

DISCLOSURE: I received free product from Buttons Galore and Deflecto Crafts to use for this project. All designs are my own.

I love buttons. Round buttons, big buttons, shape buttons -- I love them all. That is why I am such a fan of Buttons Galore. They have a ton of adorable buttons made for sewing, scrapbooking, cardmaking, and any other crafty project you can think of. So I was so pleased be chosen to be a guest contributor over at their blog!


For the full instructions and supply list for this awesome back to school frame featuring Deflecto frames, head over to the Buttons Galore blog!

Disclosure: This is a sponsored post. As a member of the Deflecto Design Team I have been provided product in exchange for my creative ideas, views and opinions.

Thursday, July 16, 2015

"My School Day" time book


It may be only July, but here in Georgia it is almost back to school time -- kids go back in just a couple of weeks! And while a new school year is always an exciting time, it can also be a little stressful, especially for kids who are just starting school or kids who need a routine. That's where the "My School Day" book comes in.


When I was a teacher, I got a lot of questions about what time we would do certain things. First graders always wanted to know, "When do we go to recess? When do we go to art/music/etc?" With this little book, made from Deflecto's 3"x5" flexible pouches, you can introduce kids to their daily school schedule before the school year starts AND practice telling time!


Directions:
1. Stamp a clock face onto 3x5 pieces of white cardstock and put the appropriate time for the child's activities (you can get the daily schedule from the teacher before school starts). I made cards for getting on the bus, school start time. lunch time, "specials" time (art/music/PE), recess, and end of day, but you may need different ones for your kids.
2. Print the words and the times for each activity on the computer and attach them to each card. Of course, you can always hand-write these! With this, kids learning to tell time can match the clock face with the "digital" time.
3. Edge each card with washi tape.
4. Make a front and back cover. This is a great place to use scraps! Be sure to include a place on the inside of the front cover for the child's name, address, and phone number. If the child rides the bus, put what bus number they ride home on the inside of the back cover.
5. Use a book binding ring to hold the pouches together and decorate with ribbon!

With this book, kids get an introduction to their school day before the big day arrives. Since it's made with these cool pouches, it's small enough that kids can carry it in their book bags.

Here's to a less-stressful first day of school!

Materials used:
Deflecto flexible pouches
white cardstock
patterned paper and journaling card from Keller's Creations
letter stickers from The Paper Studio
embellishments from Queen and Co.
adhesives from ThermOWeb
book ring
ribbon
clock face stamp
pen from Zig

Disclosure: This is a sponsored post. As a member of the Deflecto Design Team I have been provided product in exchange for my creative ideas, views and opinions.

Wednesday, June 24, 2015

Creating with Joy - Dollar Store Summer Makeover

You may know from my last post that I love summer. However, there is something I love even more than summer: saving money!

I am a crazy frugal girl; heck, I was even a panel speaker at the International Coupon Conference a few years ago! So it is almost needless to say that I do a lot of shopping at the Dollar Tree. I can always find a good bargain there. Just this month, I found a fun tropical print tote bag and a pair of all black sunglasses, each just $1. Cute enough as they were but kind of plain. So I gave these two items a million dollar makeover with Joy embroidered letters!


I used the white varsity letters on the bag to add my initials. Full disclosure here: I didn't iron these letters on since the bag is made of a synthetic material that doesn't hold up to an iron. Instead, I attached the letters using 3-in1 Adhesive from Beacon Adhesives and it worked perfectly. However, if you use a bag that is made from canvas or another fabric that won't melt when subjected to heat, iron those letters on -- it's super easy! Just iron from the back side of the fabric!


Next, I used Joy's small monogram letters to add my initials to each side of the glasses again using Beacon's 3-in-1. And since a girl can never have enough bling, I added a clear rhinestone to the letter and used black adhesive rhinestone sheets from The Buckle Boutique to decorate the earpieces (I laid the earpieces down on a sheet of scratch paper and traced around them, then used that as a template for cutting my rhinestone sheets).

Now, instead of just an everyday bag and pair of glasses, I can hit the pool looking like a million bucks!

Want more ideas on how to use Joy letters? Come on over to the Creating with Joy blog. My fellow designers have some amazing ideas!

Materials used:
Joy embroidered letters
tote bag and glasses from the Dollar Tree
adhesive rhinestone sheets from The Buckle Boutique
adhesive from Beacon Adhesives
single rhinestone from Want2Scrap

Disclosure: I received these embroidered letters from Joy as a part of their design team. However, I received no compensation or consideration from Dollar Tree or any other companies included in this post. All opinions are my own.

Friday, May 22, 2015

Creating with Joy Frame

I am Creating with


Joy S.A. Embroidered Letters & Appliques for Wearables & Home Decor 

I am pleased to announce that I am going to be a part of the "Creating with Joy" ambassador team. Joy S. A. Inc. makes awesome embroidered applique letters and designs that make any project beautiful.

Joy S.A. is sponsoring a blog hop with Designer Crafts Connections so be sure to check out all the amazing projects from the other designers. Use the arrows beneath the logo in my sidebar to the right to navigate the web ring.  And there is a new blog that where we will be sharing our projects each month -- check it out here!

Here's my project!


I am a huge Atlanta Braves fan, so I wanted to make a frame to feature my favorite teamI just added the Joy 3" Varsity Letters in red to a clear acrylic frame from Deflecto to go from plain to fab! These letters are gorgeous! The embroidery is beautiful and the adhesive really sticks, making them a great way to personalize almost anything.

For more inspiration, look through all of the projects on the DCC blog hop and check out our "Creating with Joy" blog and Facebook page!

Thanks for stopping by!

Disclosure: This is a sponsored post. As a member of the Deflecto Design Team I have been provided product in exchange for my creative ideas, views and opinions.


Monday, April 20, 2015

Mother's Day Masterpiece Magnet


May will be here before you know it, and with it comes Mother's Day!

My mom always loved the gifts I made for her the most (and she still does), and I think most moms are the same way. So this month's Deflecto Crafts project is a fun gift for moms that they will love and kids will love to make!

I started with the Deflecto customizable magnetic craft sheets. These sheets are so easy to use! They have a white facing to them that can be painted, inked, covered with paper... you name it. They can also be easily cut with scissors and craft knives and you can use punches and die cut machines. (These sheets are being rolled out to stores soon -- ask your local craft store to carry them!)


I just used a ruler, a permanent marker, a pair of scissors, and a craft knife (for the center) to cut out my frame, making it 4" x 5". The great thing about this simple frame is that you can let kids make whatever design they want using markers or paint, drawing directly on the white surface. I used Copic and Spectrum Noir markers, giving my frame a little bit of a stained glass look.

For the finishing touch, I put a school picture in the frame and added a little tag that says "Happy Mother's Day from your little masterpiece!"

And yes, that little girl in the picture is me in the 3rd grade!

Materials used:
Deflecto magnetic craft sheets
Copic and Spectrum Noir markers
Fiskars Amplify mixed media scissors
Fiskars fingertip craft knife
Martha Stewart Crafts permanent marker

Disclosure: This is a sponsored post. As a member of the Deflecto Design Team I have been provided product in exchange for my creative ideas, views and opinions.

Wednesday, March 11, 2015

Wearing o' the green!

It's March which means it's time for St. Patrick's Day! It's also National Craft Month so it's also time to make something. So let's go green!


I decided that for this month's Deflecto design team project, my frames needed to wear the green! And I got to decorate my frames with the decorating items that I love most: washi tape, buttons, and (my new favorite) glass stones.


My first frame was already decked out in green; it's one of Deflecto's cool acrylic frames with a color border. Then I just added green-striped washi tape and lots of buttons in all shades of green. 


My second frame was a just clear acrylic frame that got jazzed up by some green glass stones. The best part about these stones? They came from the Dollar Tree! Yep, a big bag of these beauties were only $1. They may have been inexpensive, but they look like a million bucks! They were so easy to attach too; I put a thin line of Beacon Quick Grip adhesive around all four edges and stuck the glass on (the quick grab of this adhesive means this frame was ready to go in about 15 minutes).

But of course, a frame is just a frame without a picture, right? I am especially proud of these photos as they were taken in Ireland. The "Leprechaun Crossing" sign was taken at Killarney National Park in Co. Kerry, Ireland. The photo of my husband and me was taken near Dingle in western Ireland. We are posing with a ogham (pronounced "ohm") stone. An ogham stone is an upright stone inscribed with the lines and notches of the early Irish ogham alphabet. This stone has a hole in it; people would use these stones with holes as a way to make deals. If you touched fingers through the hole in the stone, the was binding until death.

Materials used:
Frames: Deflecto
Washi Tape: Darice
Glass stones: Dollar Tree
Buttons: miscellaneous

Disclosure: This is a sponsored post. As a member of the Deflecto Design Team I have been provided product in exchange for my creative ideas, views and opinions.

Monday, February 2, 2015

Valentine Frame Projects


It's February and love is in the air... and I am in love with these frames!

For the first frame, I used this cool beveled edge frame from Deflecto. I stamped directly onto the frame with white Staz-On ink.


I used a background stamp from Hero Arts and just used the edges to stamp around the edges of the frame.

Never stamped on acrylic before? It's easy! Just make sure you use a solvent-based ink like Staz-On. Mess up? No problem! I use a product called Bestine which is a paint thinner/solvent on a paper towel -- the ink wipes right off.


I love this technique because it gives the look of glass etching.

The next frame was inspired by the big trend at this year's CHA show: GOLD!


I used a pink-edged acrylic frame for my base. I added gold glitter tape from Darice around the edges of the frame opening. I then used ribbon that I have been hoarding for years! It's so cute -- the words "I Love U" are actually cut out of the ribbons and edged in gold. Finally, I added some hot pink and gold bling to each corner of the ribbon.

Here's wishing y'all a wonderful and love-filled Valentine's Day!

Materials used (stamped frame):
Deflecto Crafts bevel edge frame
Staz-On Ink from Tsukineko
Butterfly embellishment from SEI
Thermoweb adhesive Zots

Materials used (pink frame):
Deflecto Crafts acrylic frame
Gold glitter tape from Darice
ribbon
Twinkle Goosebumps embellishments from Queen and Co.
Pink rhinestones from Want2Scrap
Thermoweb adhesive Zots

Disclosure: This is a sponsored post. As a member of the Deflecto Design Team I have been provided product in exchange for my creative ideas, views and opinions.

Monday, January 26, 2015

Vintage Baby Collage Project

It may be the beginning of a new year, but I am feeling a little retro! This month, I decided to give a Deflecto wet-erase sign a vintage feel.


Deflecto makes these beautiful display signs that you can use with Deflecto's wet erase chalkboard markers. They start out looking like this.


To make the sign look vintage, I painted it with DecoArt Americana Decor Chalky Finish Paint. It is an ultra-matte paint that leaves a gorgeous finish. I used a foam brush and very little paint, almost a dry brush technique, so that a little of the wood finish would show through.

I covered the black wet-erase sign surface with paper from Graphic 45's "Little Darlings" collection from a few years back -- it is still my favorite vintage baby collection! I then accented it with a small piece of canvas, a metal filigree embellishment, a button, and a bit of vintage ledger paper.

And who is that cute baby? Well, I don't know! You see, I love to buy old photos at flea markets, antique shops, and the like. Consider it store-bought ancestors -- how else can you choose your own relatives?! I especially love old baby photos; I love to make up stories about them and who they might have been. I decided to call this sweet baby Ruby Sue!

Materials used:
Deflecto wet-erase sign
DecoArt Americana Decor Chalky Finish Paint in "Vintage"
Graphic 45 patterned paper
Canvas Corp. canvas rectangle
Recollections metal filigree embellishment
ColorSnap Colorbox Chalk Ink in "Chestnut Roan"
Scotch ATG adhesive
Thermoweb Zots adhesive

Disclosure: This is a sponsored post. As a member of the Deflecto Design Team I have been provided product in exchange for my creative ideas, views and opinions.

Sunday, October 26, 2014

Easy Christmas Card Holders


My project this month for the Deflecto design team is something that we can all use in the upcoming holiday season - quick and easy card holders!

I love to display the Christmas cards we get from family and friends, but I am always at a loss as to how to show them off. When I saw the VersaGrip magnetic sign holders and angled sign holders, I knew that I could turn them into a holiday-rific solution!

The first sign holder I altered was the angled sign holder. They start out looking like this:
Photo: Deflecto.com
With just a small plastic snowflake ornament from Michaels and a couple of glue dots, it turns into a simple but cute card holder!


The other Deflecto product that I used was the VersaGrip magnetic sign holders.

Photo: Deflecto.com
On this holder, I added some tinsel and a piece of a vintage plastic floral spray (I adore vintage Christmas stuff!).


For a finishing touch, I made a "Merry Christmas" sign using Deflecto's chalkboard-look sign tags! These tags are so cool -- they can be cut to size and you can clean off the ink from the included pen with water.


I decorated the other holder with mini ornaments I picked up at Michaels and some clear tinsel.


I hope that these have inspired you! You can use so many different bits and baubles to turn these sign holders into a cool part of your holiday decor!

Materials used:
sign holders and sign tags - Deflecto
mini ornaments - Michaels
adhesive - Thermoweb
tinsel and vintage spray from my stash!

Disclosure: This is a sponsored post. As a member of the Deflecto Design Team I have been provided product in exchange for my creative ideas, views and opinions.

Sunday, September 28, 2014

Organizing the Easy Way!

This post is highlighting products I received as a Deflecto USA Ammbassador design team member.

I am in love. Serious, big time love... with my new Deflecto USA organization supplies.

I have serious problems with organizing my craft room. Usually it looks like some sort of storm blew through. I have way too much stuff and not enough room to store it all. I have tried to get a handle on the chaos with tons of types of organization, especially with my small items. I have used jars (cute but not really practical if you have lots of stuff you want to organize in groups), plastic storage boxes (but where do you put all of those once you fill them?), binders, bags... you get the idea. I was never super happy with any of them.

But wait? What's this?


These are the new Craft Tilt Bins from Deflecto USA. They come with different numbers of bins (these are the 5 and 6 bin models) and they interlock so you can stack them! The other cool thing is that you can even mount them to the wall.

I placed mine right on my worktable so I can easily access the supplies I use the most, namely inks and adhesives... and snacks. Yep, one bin just for my scrappin' snacks.

And yes, while putting stuff in those bins, I realized I have a real problem with Colorbox Cat's Eye Chalk Inks. There should be a 12-step program. ColorBox, I can't quit you.


The bins tilt out for easy access to your goodies. Isn't that clever? Each bin also has a place for a little tag to identify what's in your bins, but I left those out in case I get crazy and switch things up on the fly. :)

But wait, there's more!


Deflecto also makes these Stackable Cube Organizers. They come in different configurations: here you see the open bin (holding my large scissors and ATG guns), the X bin (which holds pens beautifully), and the 4-drawer bin (where I keep small tools, glue pens, etc.). These fit nicely on the corner of my worktable.

And that's not all...


How awesome is this? This is the Carousel Rotating Organizer. It has six 3" canisters and 3 6" canisters, each with snap tight lids, and the whole thing is on a spinning base! It's great for storing embellishments, washi tape, tools, and more.

These organizers can be used for so much more than scrap supplies. Take a look at our Deflecto Facebook page and the Deflecto Pinterest page for lots more ideas!

To learn more about these organization products and where to get them, head over to the Deflecto USA site. If you can't find these items in your area, ask your local craft, hobby, and office supply stores to stock them! Now go get organizing!

This is part one of my Deflecto USA Ambassador Design Team posts. Join me later in the week to see my project using Deflecto's magnetic craft sheets!

Disclosure: This is a sponsored post. As a member of the Deflecto Design Team I have been provided product in exchange for my creative ideas, views and opinions.

Monday, August 25, 2014

My First Deflecto Ambassadors DT Projects!

I am so excited to be a member of the very first Deflecto USA Ambassador Design Team! 

Deflecto has always been in the business of items like office organization, chair mats, and literature displays. But now, they are venturing into the arts and crafts industry with cool acrylic frames, magnetic sheets, craft storage, and more!

For our first project, the team got to work with some of Deflecto's new acrylic frames. The frames come in tons of sizes, from 1 1/2" x 2" all the way up to 12 x 12. The frames also come in different types, including magnetic, stand-up, and hanging frames.

I was so excited to make something with these frames that I made TWO projects!


The first is a Disney countdown calendar. The best part of this calendar is that it's a dry erase calendar so you can easily change the days as your vacation gets closer. Dry erase markers work amazingly well on these frames!

I edged the sides with washi tape from Queen and Co. and the top and bottom with Queen and Co. ribbon. The interior of the frame is scrapbook paper embellished with letter stickers and a die-cut. Since the days are written in with a dry erase marker, you never have to move the paper inside the frame!


The second project is a Disney frame (featuring me and my wonderful husband on one of our Disney cruises). I started with a 6x9 black-edged frame and then embellished it with Plaid Mod Melts! (If you have never seen Mod Melts, check out my posts about them here and here.)


These Mod Melt letters are so fun to make and can be adhered easily with glue dots.


The balloons and the banner are also Mod Melts that I painted with acrylic paint, embellished with twine, and adhered with glue dots.

These Deflecto frames are so much fun to work with! You can use them for so much more than just picture frames too. For more awesome ideas, please go check out our design team Pinterest page!

Dry-erase calendar materials used:
Deflecto 8x10 hanging frame
Ribbon and washi tape by Queen and Co.
Embellishments by EK Success
Die cut by EZ Lazer Designs
Patterned paper by Sandylion
Cardstock by Bazzill
Alpha stickers by The Paper Studio/Hobby Lobby
Adhesive by Thermoweb

Embellished frame materials used:
Deflecto 5x7 frame
Mod Podge Mod Melts embellishments by Plaid
Baker's twine by Jillibean Soup
Acrylic paint by Craft Smart/Michaels
Adhesive by Thermoweb

Disclosure: This is a sponsored post. As a member of the Deflecto Design Team I have been provided product in exchange for my creative ideas, views and opinions.

Wednesday, April 4, 2012

April challenge reveal and announcement

Today is reveal day over at Better Living Through Scrapbooking!

The first challenge of April is a color challenge: PASTELS! I don't scrap with pastel colors very much, but I loved using soft pinks on this altered art piece I made.

I made this from a paper mache "L" that I found at Hobby Lobby. I covered it with scraps of paper from my stash using Mod Podge. I am really big on saving my scraps of paper and this project shows why. I didn't have to cut up a brand-new sheet of paper; I had plenty of scraps that were just the right size, and the collage feel of the different papers lent itself to the vintage vibe of the whole thing.

Materials used:
Paper -- Heidi Swapp, 7Gypsies, Marah Johnson for Creative Imaginations
Embellishments -- The Girls' Paperie, Prima, Making Memories, Heidi Grace, Heidi Swapp
Ink -- ColorSnap Colorbox Fluid Chalk Ink in "Chestnut Roan"
Adhesive -- Glue Arts, Mod Podge

Now for the big announcement...
I am taking over ownership of Better Living Through Scrapbooking! Beth, who has been the wonderful owner/administrator/DT member/DT coordinator, is a crazy busy girl. She has a busy job and is on several other design teams besides Better Scrap, so she is handing it over to yours truly! I am very excited about this opportunity and I can't wait to grow the site even more. The most exciting part going forward will be a new design team call in the very near future! I will be advertising the DT call here, on Facebook, and on some DT call sites so be on the lookout for that.

Please come play with us this month over at BLTS! Take part in our challenges and you could be in the drawing for our quarterly prize. We'd love to see you there!

Wednesday, March 21, 2012

Design team reveal: Lucky girl!


Today's the day for the second challenge of March over on Better Living Through Scrapbooking!

This challenge is all about a person that you are lucky to have in your life. I have so many people in my life that I am lucky to have, including my husband, my parents, and my friends, but I am super-lucky to have met my wonderful friend Kerry. She and I get along famously and I love her. She is "wicked awesome"... and yes, she's from the Boston area, so she says "wicked"!

This layout was such a fun one to make. I got to use some of the super-duper, brand new, not even in stores yet paper from the "Wave Searcher" collection by Fancy Pants! It's the fun, summery plaid background paper (thanks to the wonderful people at Fancy Pants for letting me get my mitts on some of this paper!). I also got to use lots of little scraps of paper and ribbon. There's a reason why I don't throw those away; they are just begging to be used on a layout like this one!

Hop on over to Better Living Through Scrapbooking to see the design team's take on the challenge, then make your own and post it on the Facebook page! You could win the monthly prize!
 
Images by Freepik